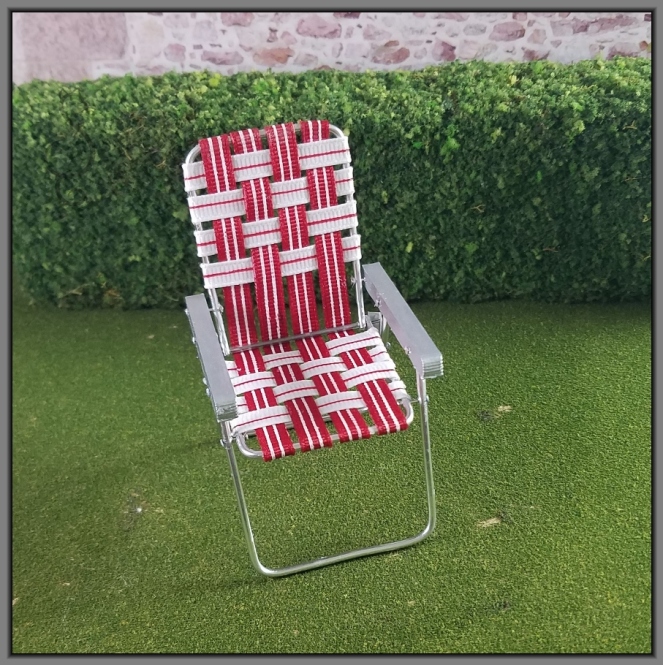
Hello there….ready for part two?
Strip your chair frame back down to just the seat and backrest.

Choose your color scheme. I used 1/4″ grosgrain ribbon for my chairs. You will need 4 pcs approximately 6″ long for the webbing that runs from the back rest to the seat. Cross webbing you will need 8 pcs of 2.5″ of ribbon/webbing.
Trim the ends long ribbon/webbing by cutting off the corners to form a v shape at the end. I usually do this one at time to prevent raveling. You can also run the ends through a flame to seal the ends.
Best glue that I used was the beacon quick grip.


Starting at the top of the back rest, Glue the four long pcs to the top of the back rest with having the end of the ribbon going over the top the the wire frame and finishing at the back.
Be sure to have the ribbon glued straight and evenly spaced as possible.
Next weave the cross ribbons on the back rest.

Once i have them spaced and weaved ( be sure to not glue your ribbons over the drill holes where your armrests will be attached) I glue them to the back rest with a little bit of glue. This is to hold them in place until I can turn the chair over to finish gluing to the back of the back rest.
One the glue is dry I trim the ribbon to where they extend just about a 1/4″ beyond the wire frame.
Then start cutting the corners off the ribbon/webbing to create the v shape. Wrap around to the back and glue in place.

Glue both sides.
This is not necessary, however, if you have some shrink tube add it to the music wire that acts like the hinge pin for the chair. This helps with the chair not being able to shift sideways bringing more stability to the chair.


The long ribbon/webbing thread behind the music wire. Weave the remaining 4 pcs of cross ribbon/webbing for the seat of the chair. Be sure to stay away from where the seat attaches to the front legs.

And finish like the back rest with trimming and gluing in place.
Once all the cross ribbon/webbing is glued, fold up the chair and finish off the long ribbon/webbing at the seat edge. By folding up the chair, it will help with not putting too much tension on the ribbon/webbing. If there is too much tension, the chair will have hard time staying in the folded position.

Primer and paint your armrests. I used silver alcohol ink for my top coat. Nail polish is good too.

Reassemble your chair.

Optional: I added little punched card stock caps painted silver to resemble the webbing fasteners.


Reassemble your chair and fold in half. Hold in place with rubber band. Trim off the head pins extended out the sides as close as possible.

Do not trim the music wire close. Leave it long enough to just extend to the wire frame.
Once you have trimmed off the head pins, place a little bit of glue on each to help with the pin not falling back out on you. Then add the little card stock caps to cover the exposed head pins.

Finish both sides and you are done.


Miniature Folding Lawn Chair Tutorial Part One
Have fun folding and unfolding your little lawn chair and start on a matching one…cause you can’t just have one right?
Anyone out there just doesn’t want to make their own and wish there was way to own a set, I am thinking of selling. Drop me a message with what color you may be interested in and I will try to get it available as soon as I can.
I am starting a tip jar in the hopes that with a little extra fuel, I can devote some more time to posting more tutorials.

Tip Jar
Happy with the tutorials that I have posted and you wish to send me a little tip , here is the spot do do that.
$1.00


Looks like a well-planned tutorial! How much would you be selling the chairs for?
Meredith W-B
>
LikeLike
Hi Meredith…not sure yet still streamlining the process to see if it is feasible …at this point I would guess about 250.00 a pair. Thank you!
LikeLike
Love the retro furniture.
LikeLike
Thank you!
LikeLike
I know I am not the brightest star in the sky, But seems a couple of steps left out. I thinking part 1 gonna try still.
LikeLike
Yay! Glad you are going to give it a try!
LikeLike