
 So here I go again. Late but as least getting it done. I lost a follower last week and that made me very sad.
Thank you all of my faithful followers that hang in there with me! I do appreciate you all!
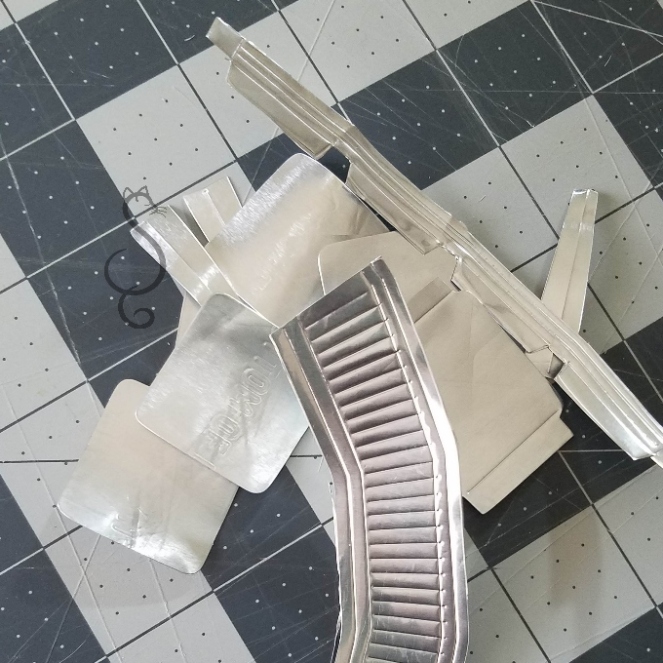
This is a little bit different as in I used a heavy duty cooking foil pan instead of paper. But if you want you can still do this project in card stock. I just wanted to change it up a little bit and the standing wash tub seemed perfect for using the foil material.
I cut out the bottom of a foil pain and used a bone folder to smooth out to be flat .


The foil is very shiny reflective, so if you want a more dull surface, like galvanized, then lightly sand the surface with some steel wool. I would do this before tracing my shapes onto the foil. I didn’t do this and ending up sanding mine after assembling.
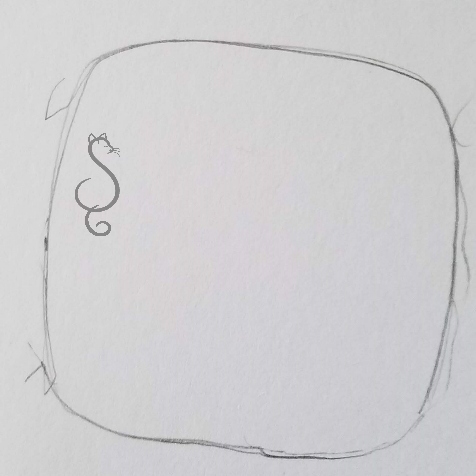
Take the pattern and tape to the foil and layer over some soft surface such as fun foam or mouse pad. Trace the design with a ball stylus or old empty ball point pen. The pattern is saved on a standard size paper 8 1/2 by 11″. Use the one inch square as reference for sizing.


Cut out your pieces. I started out with an exacto/kraft knife but ended up using an old pair of scissors. Much easier. Be careful, the foil is really sharp and can cut.
The square piece with the flaps. Bend the flaps up ninety degree angle. This piece is for the bottom of the stand. You can glue a weight to the surface if you wish.

Bend each leg of the stand at the crease.

I used a ruler edge to shape them.


The stand edge piece, bend each flap at a ninety degree angle.


Roughly shape into a square like the photo above with the embossed lines facing out.
Cut out three pieces of card stock and glue them together of the smaller square piece on the pattern. Once they are dried use them to fit inside the stand edge frame.


I used 5 minute epoxy glue to glue my parts together. You can use super glue if you prefer. I tend to glue my fingers more with super glue. Not fun.


Glue the end over laps and the card stock into place.

I missed a picture of the card stock inside the frame. Sorry.
Also layer on top of each other and glue the three square pieces of foil together.

Set aside to cure the glue.
I made a couple of marks with a permanent marker on the inside of the legs of the stand. Both inside sides.
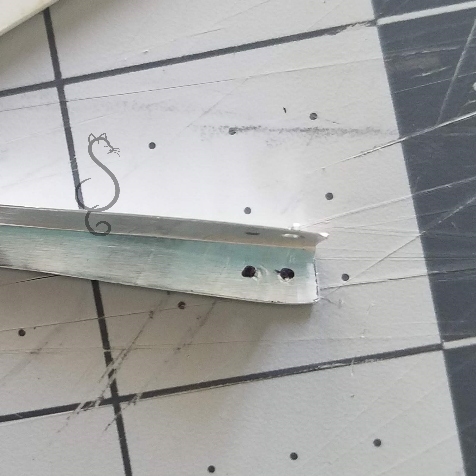
I placed the legs over a drill bit measure tool. I think even a knitting needle measure tool will work. Just something that is firm and has a small hole.


Use a ball stylus from the inside leg to emboss the marks to resemble rivets that hold the legs to the stand. Don’t press too hard or it will push through.

Wrap some 18 gauge aluminum wire around an object that is a small rectangle. Used a piece of wood that measures roughly 1/2″ wide by 1/4″ thick.

Trim and pull off the wood. Make two of these for the handles

Cut a strip of the aluminum foil just less than 1/2″ wide. It should fit into the handle.


Form two brackets for the handles. Press the foil over a tooth pick and trim. In the picture I used the 18 gauge wire…but ignore and use a toothpick. This gives room for the handle to move.
Glue the last (largest) square foil piece to the top of the stand edge.

After the glue cures, glue the four legs onto the stand.

And test fit the bottom of the stand. Don’t glue in place yet.
The wash tub itself. I did two ways to add the 18 gauge wire trim to the top edge.
I glued the wire to the top edge before shaping the tub. I found this a little more difficult than just assembling the tub by gluing the over lap and then adding the wire trim. Your choice either way works in the end.

Glue the tubs over lap and allow to cure. Emboss detail to the outside. After curing gently form the square shape using your finger as a form to curve the corners to shape. 
I placed hot glue dots into the bottom edge for the bottom of the wash tub. This helped with gluing the bottom into the wash tub. The hot glue is removed after the bottom is cured.

Looks loose but when you press in the sides to shape it snugs up. Glue and cure.
Turn over and trace an outline of the top edge. Shape the 18 gauge wire following the outline.
Slide onto the wash tub and glue into place. I used tiny clothes pins to hold in place while the glue was curing.

After cured, glue on your handles. Be mindful of the overlap edge. You want to position the handles so that the over lap edge is to the back of your tub.

I cut 4 pieces of toothpick into 1/4″ pieces. Glue these into your legs at the bottom.

Now you can add in the bottom to the edge piece if you wish. I used it to add weight to the stand by gluing in a penny.
After all is cured. You can use a wash of black paint and blot with paper towel to distress the piece to look older and more like galvanized metal or leave it bright and shiny new. I used mine as a drink cooler for the feature picture but there will be a vintage project coming along to use it another way.

Happy Memorial Day Weekend!

Thanks for stopping by


Great tutorial! Thanks!
LikeLike
TY! 🙂
LikeLike
So cute! I love how you used the foil pan! Great tutorial!
LikeLike
Thank you! 🙂 ♥
LikeLike
Great tutorial. Thanks for sharing
LikeLike
TY! 🙂
LikeLike
Beautifully Constructed! Your finished wash tub looks 100% true to its Full-sized Original! 😀
LikeLike
Thank you! Made my day! 🙂
LikeLike
First: such a fun idea! I love how detailed your tutorials are. Thank you for sharing them with us.
Second: I always forget that I can follow wordpress blogs–my brain doesn’t work that way! So yay, you have a new follower, to balance losing one.
LikeLike
So sweet of you! Made my Morning! 🙂
LikeLiked by 1 person
Love it!!!
LikeLike
TY! 🙂
LikeLike
The washtubs are gorgeous. I’m spending a few months in Germany (my real home is South Africa) so I don’t have the supplies with me to make one, but as soon as I get home I’m going to give it a try.
Please don’t be sad at losing a follower. People’s interests change and it’s usually something to do with the place they’re at in their lives and nothing to do with you. But I know that feeling very well, I think it’s a leftover from playground days when someone wouldn’t play with us.
LikeLike
Thank you ! Playground rejection a good analogy. The roller coaster up and downs of being creative and the reception we receive can be challenging some days. I was in a down dive that day and took it to heart. You made my day! Happy traveling !
LikeLike
I’m so glad I took a shot at searching for a mini washtub pattern! Thank you so much for sharing it. Your tutorial is excellent, too. I tried the main pattern on two layers of that shiny metal tape for heating ducts, and I think it could work! Working with heavy foil opens up so many possibilities!! Thanks again.
LikeLike
Made my night to hear this!
LikeLike