

Thinking of sunny days at the park has me making a miniature park bench for my little critters. I wanted the old style bench with the cast iron ends for my project. Hope you will follow along.
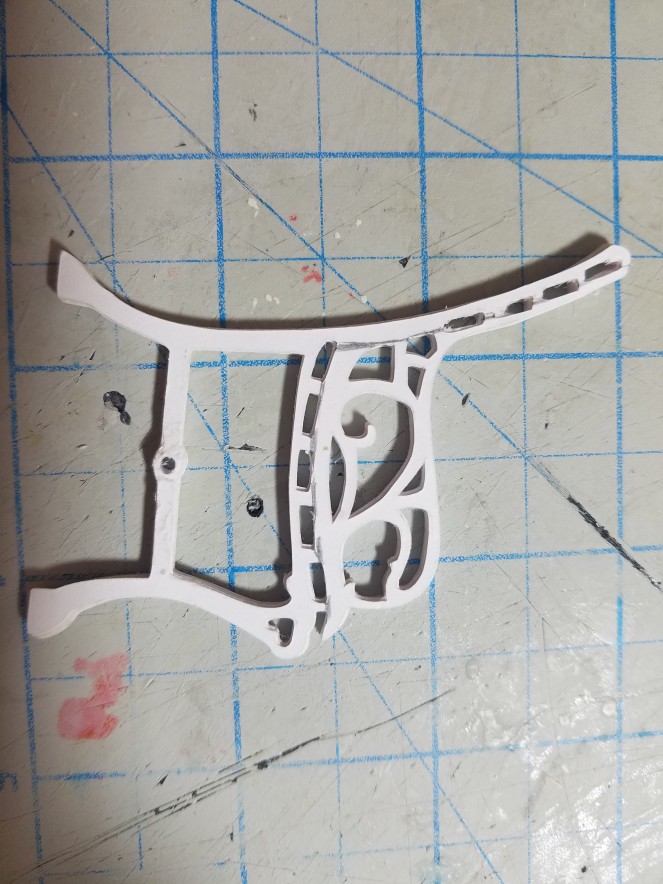
Cut out 36 pcs of the bench ends out of card stock. You can do this by hand , however, it would be great to have a scan n cut or cricut machine to do the work for you. There is a one inch square on the image for sizing your prints. I set up the art on a 8.5 by 11 sheet.


Using a glue stick apply glue to the entire surface of one of the cut outs. I used a dabbing motion to apply the glue to the surface. Add another cut out and match up as even as possible.
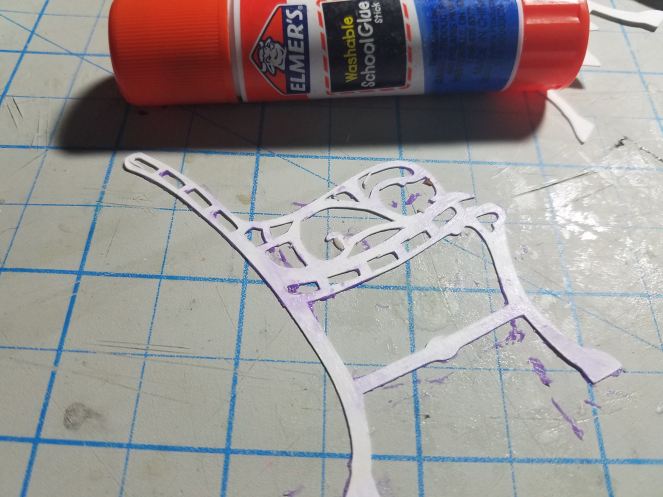
Keep on layering the bench ends to make two set of ten layers and one set of 12. Stay as straight as you can. I stand up the pieces to be sure the bottom edges are butting up even.

The 12 pcs set will be the center support of the bench and the other two sets are your end supports.
Next drill 5/64 holes through the center of the cross supports of all three sets.

Now glue on the two layers on each of the two end bench supports. Be sure to glue to the outside edge of each of the ends. Opposite of each other. The drill holes facing towards the center of the bench.

There will be a 1/16 round support that will thread though the center support and rest into the end supports.
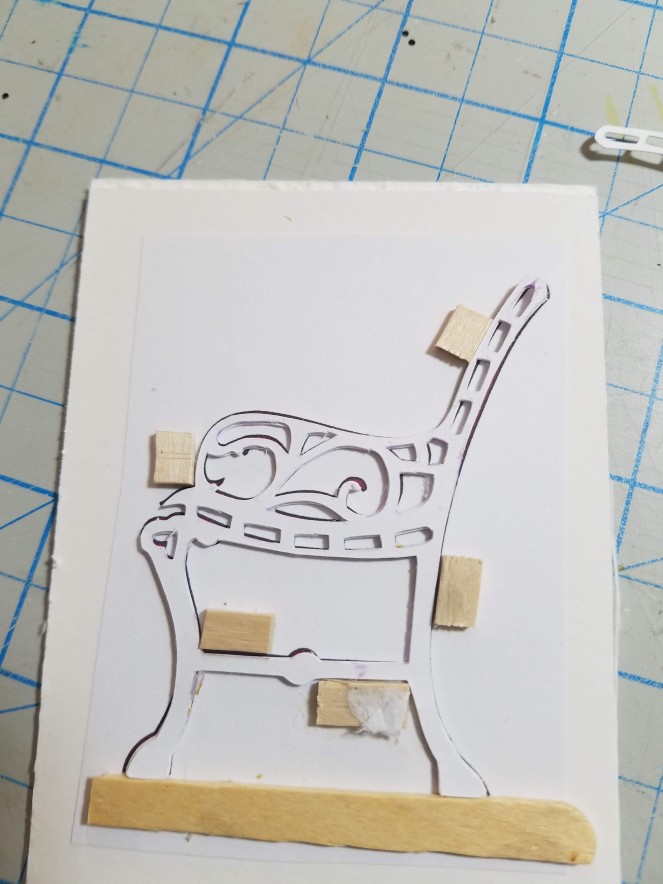
If you plan on making a few of the benches, you make want to set up a jig to help with lining up the layers.
I printed out a copy of one of the bench ends and glued it to a piece of mat board.

I then cut pieces of wood stick and glued them just to the outside of the out line of the bench end. 
Then start gluing your layers and they should line up easier than eye balling them.

Cut 10 Skinny Sticks (7 1/2″ x 3/16″ x 1/16″ ) into 5 1/4 lengths. I line up the skinny sticks and tape them down and measure for cutting.
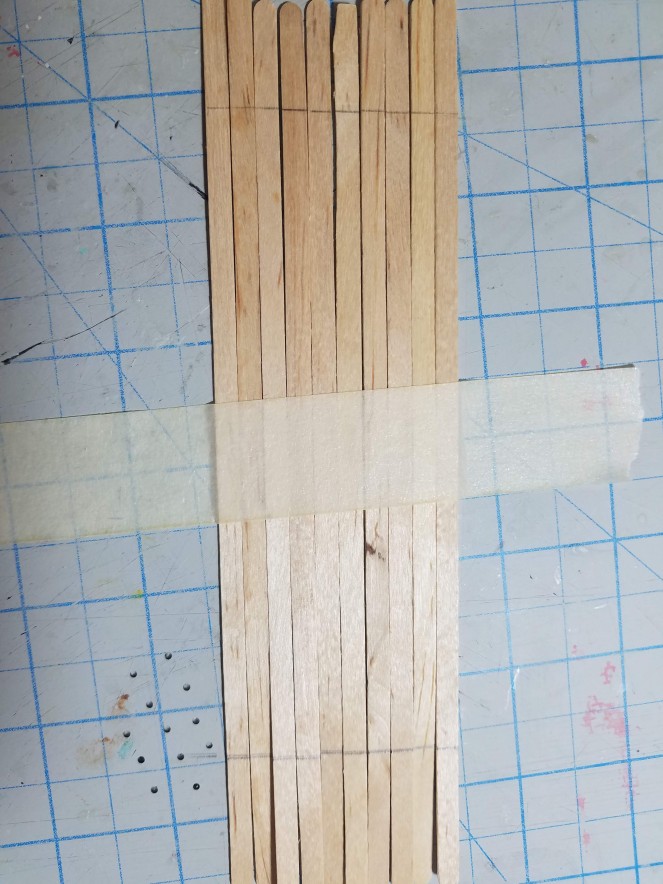
After cutting the skinny sticks, test fit the lengths through your park bench ends.
The skinny sticks should just fit through the slots. If not, use a needle file or cut down disposable emery board to sand the openings bigger.
I mark the middle bench support to cut.
Use craft knife and cut on the lines. I usually cut part way on one side and then turn it over and finish cutting through on the other side.

Stain your skinny sticks and seal. I used Spectrum Noir Alchohol markers to stain mine and a clear shoe polish wax to seal them.

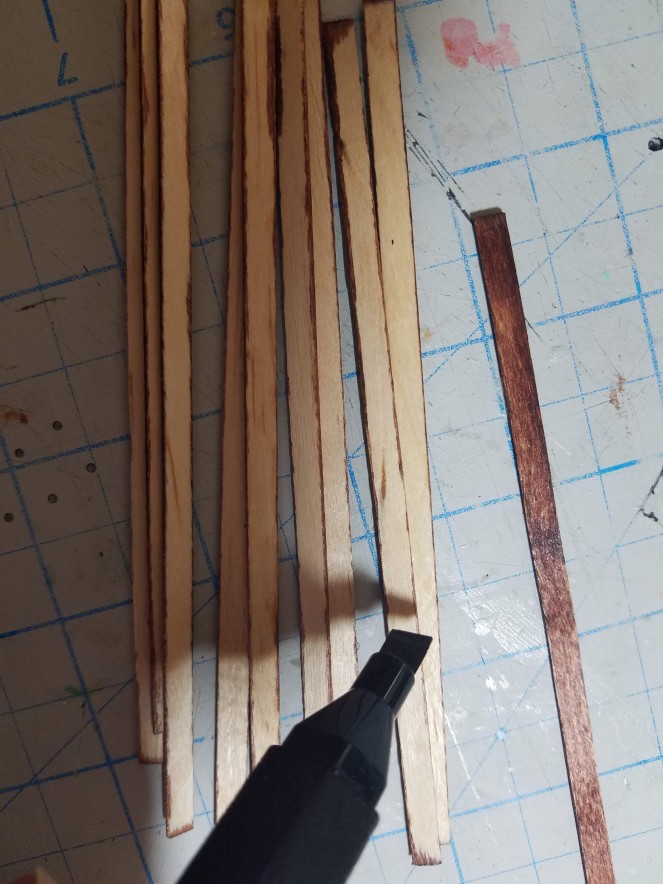


The alcohol markers come in a set of browns and you will have a variety to choose from.

Next we are going to seal the edges of the bench ends. If your like me, you will have some jagged edges where you didn’t line up perfectly while layering.
Mix a 50/50 of mod podge and corn starch.


Using my craft knife like a palette knife. I spread on the mixture to all of the edges to fill. Scraping off any excess. Do not fill in the openings where your skinny sticks will go through.
Move the remainder of you mixture to a plastic bag and cut off the corner. Pipe along the main edges and smooth with a wet paint brush. (note: I would move this step to after adding the cotton thread decorations)


I only do this to the outside edge of the bench ends.
After drying, sand smooth.
Test fit your skinny sticks on the center bench support and sand to fit. You want a snug but not tight fit.

Test fit the with all three supports.

Cut a 5″ piece of pla plastic round 1/16″ or you can use wire that will fit through the holes we drilled.

Test fit the support.

We’re almost there.
Next step is to add the detail on the bench ends. I do this with crochet cotton #10 and mod podge.
I cut a cross in the top of a disposable food container and add mod podge. Place an approximate 10-12″ length of crochet cotton thread into the container. Take one end and thread through the bottom of the lid. When you pull the thread from the top it will squeegee excess mod podge off the cotton thread.


Have a wet dish cloth ready for your fingers as this can get messy. After pulling out the thread from the mod podge, start laying it onto the side of the bench ends in a decorative pattern.

Add the cotton thread trim to all sides of the bench pieces. After drying, go back and fill in any gaps with the mod podge corn starch mixture, dry and sand.
Whoo hooo….now you can paint your bench ends. I would either spray or airbrush your color on. If you hand paint go slow and thin layers. Being careful not to fill in the slots where your skinny sticks will slide through. After drying test check fitting again. Then apply a clear sealer finish to your bench ends. Dry and test again for fit.

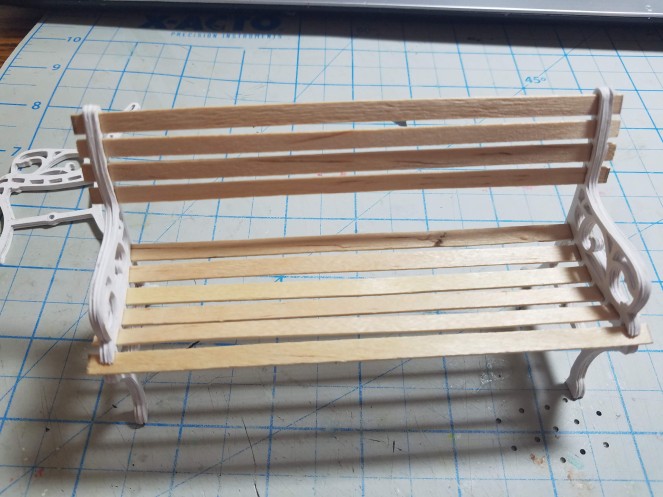
All Set. You can glue your wood in place if you wish. I left mine not glued. I may want to change the colors later.
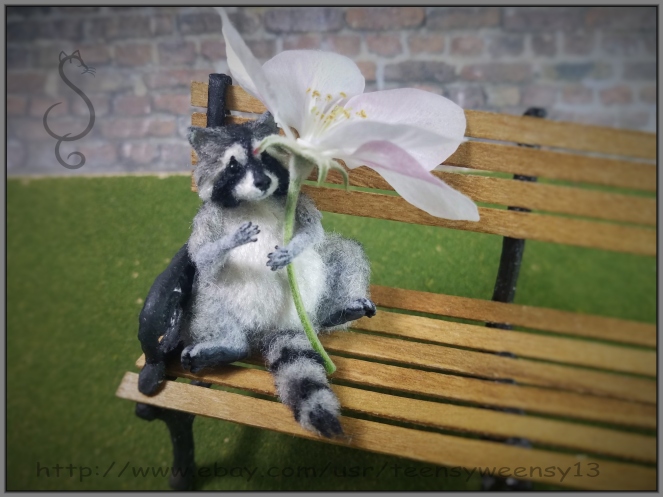
I made several of the benches while developing the tutorial so my little critter had a hard time choosing which one to sit upon to eat his snack. Stop and visit my ebay page to see more of his photo shoot if you wish.

I have a set of the bench cut outs extra. How about a free give a way? Like and comment you want to be in the running. I will draw a name on Sunday evening March 24th.
Thanks for stopping by and being patient with me as I squeeze in these tutorials. Have fun making.


Great tutorial and the McDonalds with ravenous raccoon gave me a big smile!!!
LikeLike
TY! Lori Ann 🙂
LikeLike
thanks for another great tutorial!
LikeLike
TY! 🙂
LikeLike
Thank you so much for the tutorial!
I have a bench that looks like this one in my garden. I found it at an estate sale.
LikeLike
Very Welcome! 🙂 What a lovely find to have in your garden. Little jealous here.
LikeLike
Also…you are my first entry for liking and commenting for the give away!
LikeLike
Yay!
LikeLike
What a fun tutorial… that mod podge/corn starch mix is genius!
LikeLike
TY Susanna. 🙂
LikeLike
What a lucky little raccoon! This is awe inspiring. Can’t wait to sit on my own bench, it’s been a long hard winter. Thank you so much for this on this first day of spring!
LikeLike
You’re welcome of course! 🙂 Hoping your spring arrives soon for days of warm sunshine in the garden.
LikeLiked by 1 person
What a wonderful tutorial! And your little ring tailed rascal is adorable! I would love to be included in your drawing.
LikeLike
TY Bethany! 🙂 Don’t forget to like the tutorial for being the drawing. 🙂
LikeLike
excellent result! This is another reason to buy a cricut machine…
I would like to participate in the giveaway, but I live in Italy, so I don’t know if I’m allowed
LikeLike
Yes..all are welcome to participate in the give away. I have you on the list now!
LikeLiked by 1 person
Thanks!!!
LikeLike
Dadasdollhouse did you see you won the giveaway?
LikeLiked by 1 person
Yuppppiiii!! No, I‘m abroad and I have a very poor internet connection. I’m very happy. Thank you!!!
LikeLike
🙂
LikeLiked by 1 person
Your work is ALWAYS Amazing and this park bench tutorial is Superb! And More and More I am finding crafters using the Circit cutting machine when it comes to making miniatures and so I suspect that it is fast becoming the next new wave, especially when seeing all the neat and intricate things it can do! and certainly worth a future consideration.
I also love the scenes of your little raccoon, enjoying him some Micky-D’s, and later rubbing his tummy- Mmm Mmm Good!
LikeLike
TY! Elizabeth s 🙂 Yes…so interesting , I even saw that the cricut can cut thin wood too and with the online services that will print/cut for you…the possibilities… oh my!
LikeLike
I’d like to be in the drawing, also, I needed a gift idea, this is perfect!
LikeLike
Yay! Your on the list. 🙂
LikeLike