

I think all mini makers want to make a Christmas tree to decorate for the holidays. I tried pipe cleaner trees as well as sisal trees and wasn’t happy with the results for an indoor tree to decorate. Well I manage to make the a tree…but the ornaments will have to wait until next year.
Here is my journey slash experiment to making a my miniature tree. I was striving for a noble fir tree. I will have to work on having the needles only facing upwards next attempt.
Away we go.
BTW…I made several trees in my experimentation, so there will be some color differences from the final tree…please excuse.
I cut a 1/4 dowel to about 4 inches and drilled a 1/32″ hole in one end. Taking some sand paper, I then sanded the end with the hole to taper. Paint brown. This is the tree trunk.
Starting at the top of the tree. Cut two pieces of 34 gauge wire about 8″ in length. Hold both wires together and bend in half. Twist the first section of the for about a 1″. Move down about an inch and twist the wires together again for about a 1/4″.

Open up and separate the wires in between.

Push the twisted sections towards each other til they meet. Then twist each of the four loops into individual branches.


Leave about an inch and a quarter untwisted and twist the main branches together for about 1/4″. Again separate wires and push the center twisted sections together. Twist the wire to form form more branches.
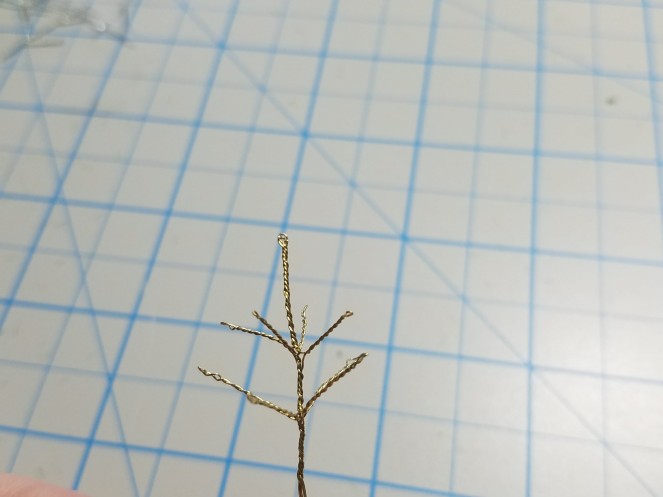
Leave about 1 1/2″ free and twist another 1/4″ section of the main branch. Separate and bring together the twisted section to meet. Twist to form the four branches.
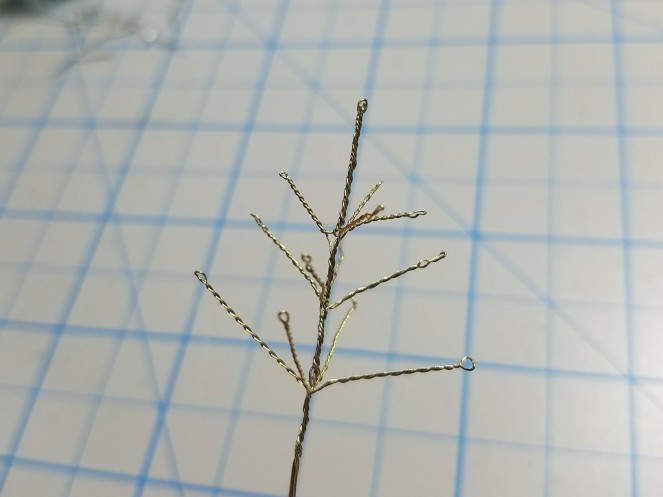
This is the top of your tree that will fit into the hole drilled in the dowel.
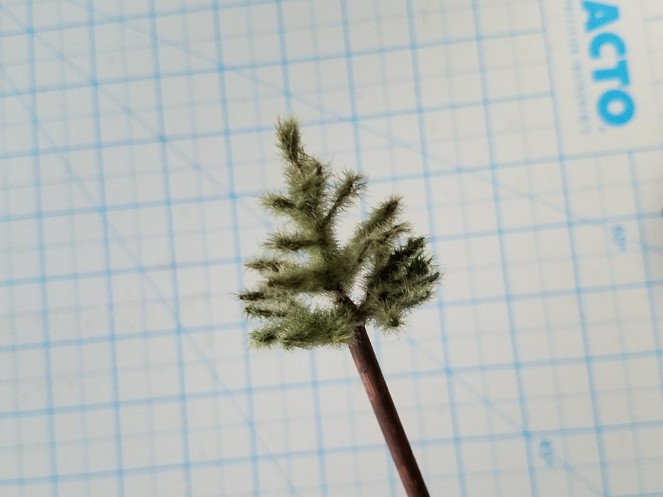
Next step is to add some needles. I mixed up some mat Mod Podge with brown coloring. Dip the wire into the mixture and let dry. (picture shows green…but use brown)

Add flocking. I used a electrostatic grass applicator to apply my flocking. There are some wonderful tutorial on the web on how to turn an electric fly swatter into a static grass applicator. In a pinch, however, you can use a bottle and blow the flocking onto the glue.


I tried several different lengths and colors of the flocking.

First one from the left is flocked with medium green woodland scenic. Next is z scale meadow grass 6mm and then Noch medium green 6mm. I ended up using the woodland scenic medium green for my final tree.
Next layer of branches for the tree. Branch A. I cut 6 pieces 30 gauge wire about 6 inches. Fold one piece in half and twist approximately 1/2 inch. Move down about 1/2″ and then twist the wire again for about 1/2″ inch. Bend the open wire outward and then twist them into small branches.


Make all six and dip into green mod podge and flock. Allow to dry thoroughly.
Drill 6 small holes around the dowel just under where the top of the tree goes into the dowel. Measure and trim base stem your branches and glue into the holes. Keep on making branches until you about 1/3 of the way down the dowel. Each time when adding a layer of the branches, trim a little less of the stem of the branch. This way the branches are just a little longer and start the shape of the tree.

Now we change up the shape of the branch. 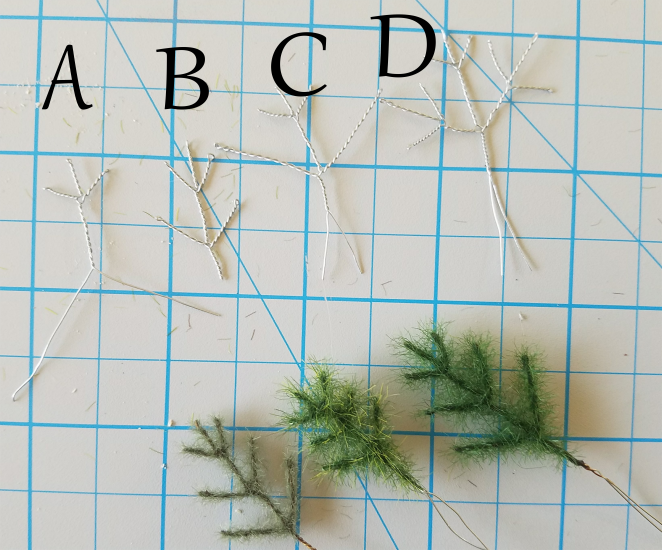
Next section of branches will be the B version. Again six pieces of approximately 7″ lengths of 30 gauge wire. Fold over in the middle one piece of wire and start just as branch A. Skip 1/2″ section and twist the wires 1/4″ Separate and twist another two branches.
Green mod podge and flock your branches. Dry, trim and add to your tree. Add a few of rows of these branches. One row getting slightly bigger than the previous row. This is really up to your taste. Tall skinny tree…short fat tree….your choice.
For branch C, cut 30 gauge wire into 9″ lengths and start as you would branch A. Once you form your tip of the branch, then skip 2″ and twist the main branch. Form the long branches just as previous branches. Dip, trim and flock. Make as many as you wish for your tree.
Finish up your tree with branch D. Using 10″ length of 30 gauge wire. Fold over and form the tip. Skip a length of 2.5″ and twist the main branch for about 1/4″. Now work the two side branches as you would the tip. Dip, Flock and glue into place. I used this branch for the last two rows on my tree. When you are gluing them onto your tree, you can move the two side branches to layer over the main branch.
Once you tree is completely dry, you can add a final coat of spray mat sealer or hair spray and tweak your branches to shape your tree.
Here is a tree where I used the spring meadow flocking. A little too light green for me. But I did like the length of the needles for a full tree.

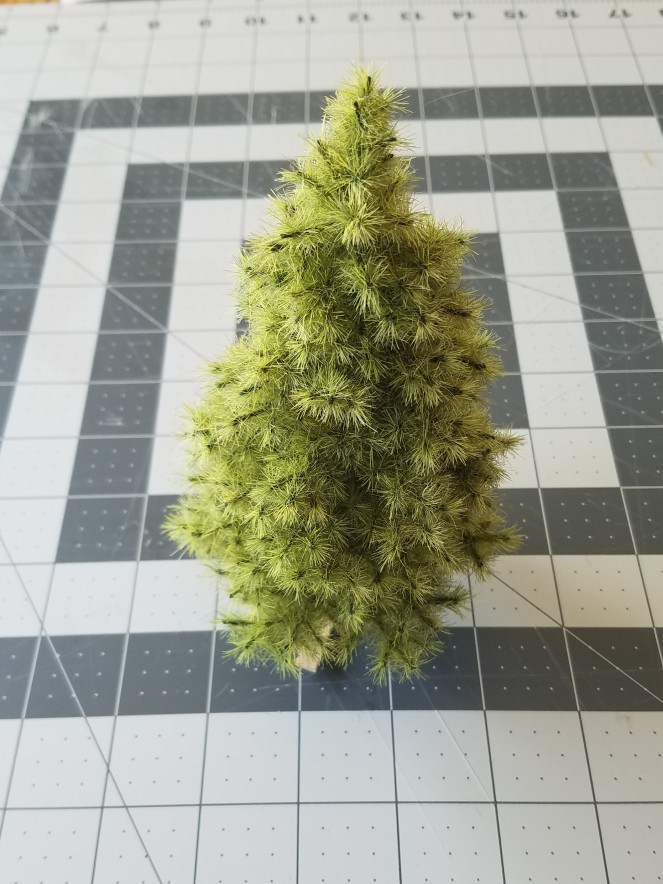
Here is the tree with the medium green scenic flocking. Ready for someone to come along and bring him home to decorate. I can see my grandmothers tree with real candles and glass ornaments.
Hope you enjoyed!
Thank you all for following me this year. I think I did manage to meet my goal of one tutorial per month. Hopefully, in 2018, I will get better and faster at posting.
Wishing you all a Merry Christmas and a Happy New year!


I admire your creativity and imagination, and the result is amazing!
I hope your Christmas is happy and bright, and that the new year brings you only good things!
LikeLike
Thanks so much! Merry Christmas and a wonderful new year to you and yours!
LikeLike
Wow! Great idea and a wonderful job you did of it, too! Thank you for sharing your talents with us. Happy belated Christmas and hopefully a fabulous NewYear!
LikeLike
Thank you! 🙂 Looking forward to a fabulous 2018. Hopefully 😀 Wishing a wonderful New Year to you and yours.
LikeLike
Just got around to making this. Thanks so much. Hope all is well with you and yours.
LikeLike
Hope you had fun with the project. This year has had a rough start. All will be well. 🙂
LikeLike
Wow, amazing tut, best tree I’ve ever seen!
LikeLike
THanks so much! 🙂
LikeLike
Missing your posts and all your little critters. Hope all is well.
LikeLike
I am alive…just having a tough summer. I hope to get back in the swing here soon. Thanks for checking! 🙂
LikeLike
Just a note to say that I hope things have improved. Sending good thoughts your way.
LikeLike
Still working on it…sigh..this year has passed me by. I will keep trying. Thanks for asking! 🙂
LikeLiked by 1 person
I just found this wonderful tutorial… thank you for all the time and effort it takes to share your creativity!
LikeLike
Happy to hear you enjoyed the tutorial! 🙂
LikeLike