
I have had a few people express interest in the tree stump that I use as a prop in some of my miniature animals photography.
Fairly simple supplies and an afternoon and you will have a tree stump ready for the garden.

Starting with some copy paper cut into 1/4″ strips, toothpick and mod podge. Start by winding a strip of the copy paper coated with mod podge around the center of a toothpick. If you don’t have mod podge…just dilute some tacky glue and use in place of mod podge

Keep adding strips of the copy paper coated with mod podge until you reach the size of the stump you desire. Try to keep the edges as even as possible. Finish out with a few 1/4″ strips of a lunch bag paper to mimic the outer ring of the stump.

Trim the toothpick off close to the paper on both sides.
Using wood filler coat the top surface and let dry.

Once dry, sand the surface flat. Add a wash of tan paint to the surface to even out the color.

You can also just start with a birch branch slices to skip all the winding and sticky fingers.
Heat up your glue gun and start adding bunches of tin foil to the bottom of your stump surface. Starting with the base and working out to the roots.

Take a paper sack lunch bag and crumple up several times and unfold. Tear pieces off and mod podge to cover the tin foil.


Let dry.
Grab a paper towel and peel the top layer off. We’re going to use the bottom layer.

The bumpy texture of the bottom layer is perfect for the tree bark. Mod podge the paper towel onto your tree stump. Rumple the paper towel as you mod podge to create wrinkles especially around the base of the roots. I pushed the paper towel with my brush bristles to push up wrinkles. Use the straight edge of the paper towel at the top edge of the tree stump.


Let dry.
Using a combination of burnt umber and black paint base coat the bark. Approximately 2/3 brunt umber and 1/3 black. Don’t mix completely the colors..but apply almost in patches and mixtures. Darker towards the bottom and crevices.

Dry.
Dry brush white paint onto the bark.
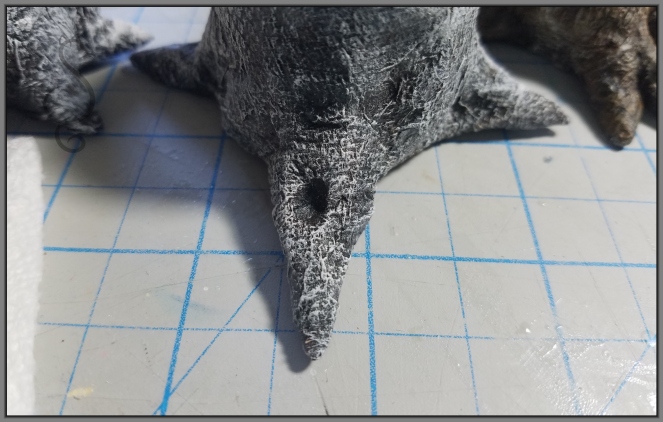
Dry brush burnt umber over the white in areas…don’t cover the white entirely. The more the color varies the better the stump will look.

Happy stumping!

Got a minute…stop by my facebook page and See what Tom the turkey does after spying the ax.


I love this tutorial. I thought it was a real tree stump …Thanks.
LikeLike
TY! Glad you enjoyed! 🙂
LikeLike
You never disappoint. The turkey is Magnificent ! Once again thank you.:)
LikeLike
Happy to share! Makes my day! 🙂
LikeLike
Just checked out Tom on your face book page. Still laughing.
LikeLike
Love Love….still chuckling myself! 🙂
LikeLike
You had me completely fooled- I thought it was REAL!
boy- Your Good!
LikeLike
🙂 Thank you! Thank you! 🙂
LikeLike