
My life has been busy with laughs and giggles. We had our grandchildren here for a week to give Mom and Dad a little break. So here is a little down and dirty quick tutorial for a wood planter box for the garden. Read on through til the end, I have a question for you.
Supplies:
- wood glue
- x-acto knife and cutting mat
- ruler
- chop it (optional)
- slim sticks wood (7.5″ x 1/16″)
- 1/16″ square bass wood
- sand paper or emery board
Make sure your x-acto knife or chop it has fresh blades to cut with. I used the chop it for most of my cuts and as you can see my little chop it has been used so much that I have had to add a piece of cutting mat under my blade as wood had been chipped away. I have been looking at wood miter shears as an addition to my tool chest. Just haven’t made a decision on the brand yet. Any recommendations?


Cut four pieces of the 1/16″ square bass wood 7/8″ in length. These are your corners. I used the chop it to cut mine. Use your ruler to set up the guide and get almost perfect matching lengths.

Then cut 16 pcs of the slim sticks into 1″ lengths. Glue 3 pcs together four times. These are the sides of the planter. Glue 4 pcs together for the bottom of the planter.

Use sand paper or emery board to even up the sides if necessary.
Next glue two posts on one side on two of the sides. Having the top edge even. As seen below.

Turn one side over and run a bead of glue down the post from the top to the bottom edge of the side panel.
Add two sides at a 90 degree angle.
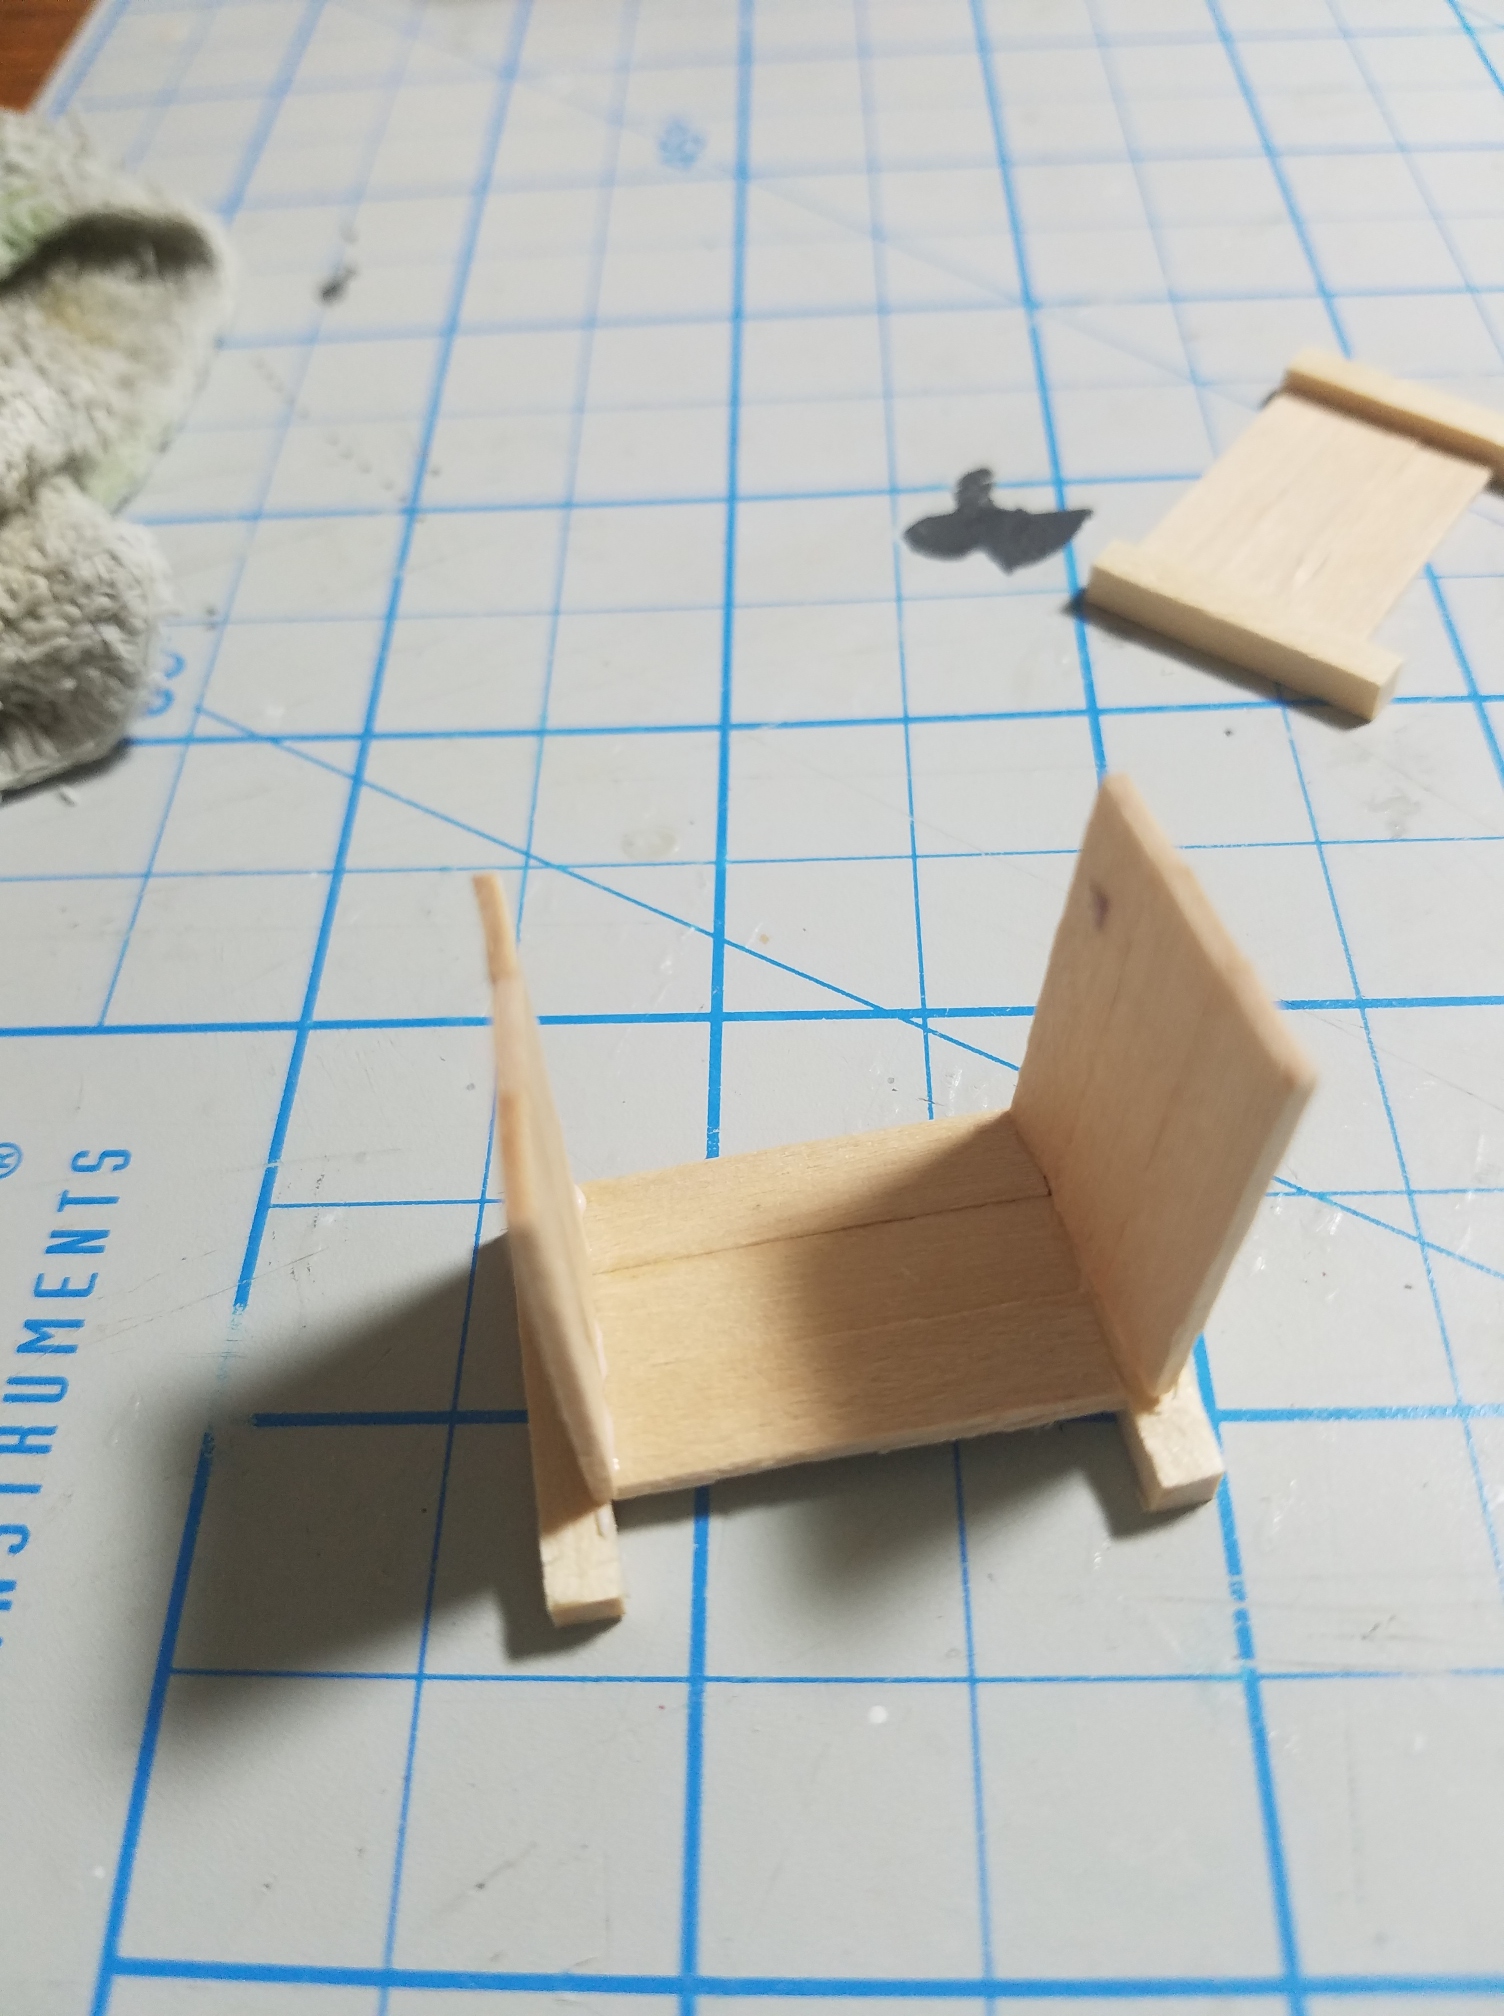
Glue four pcs of the slim stick to form the bottom of the planter. Add glue to the three edges and place the bottom in.


Glue on final side panel.

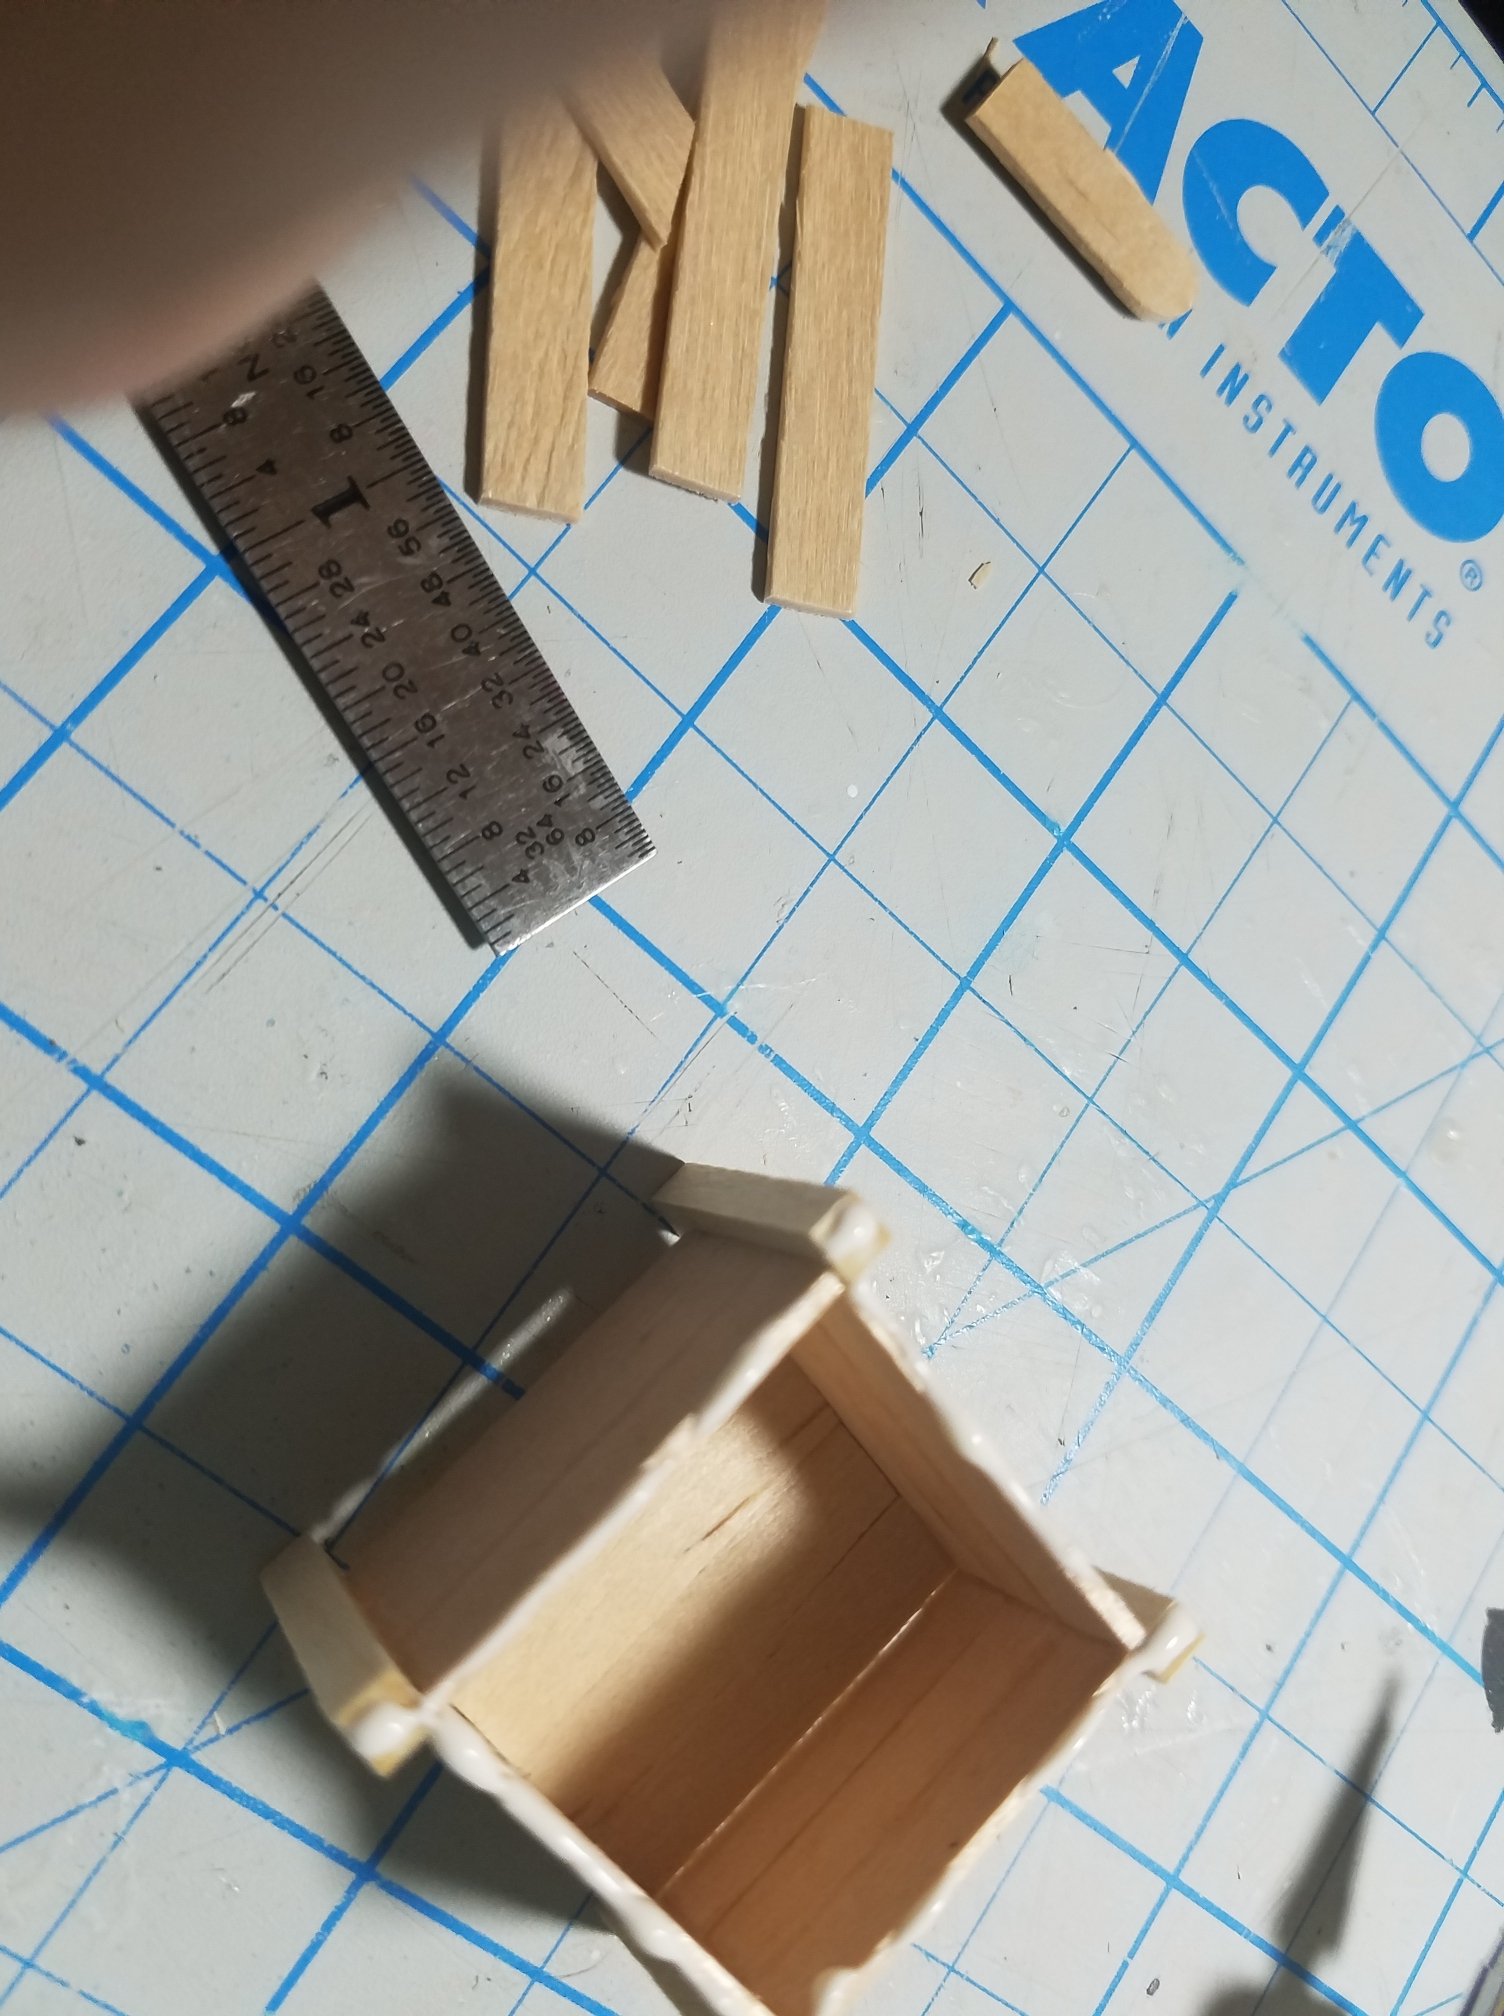
Next cut four pieces of the slim sticks 1 5/8th” in length. We are going to make the window frame top.
I can never get a good 45 degree angle using my chop it. I always seem to get a better result using my cutting board and x-acto knife.
Line up one of the slim sticks along the guide line.

With the corner right at the 45 degree line. Use your x-acto knife to cut the angle. Flip the piece over and trim the other side.

Do this to all four pcs of the frame. Align to dry fit together. Use sandpaper or emery board to adjust fit if necessary. Glue together.

add glue to the top edge of the planter box top and glue the frame to the top. Fini

Fini…now you can finish as you please. A thinned out burnt sienna acrylic wash makes a good red wood stain for the wood.
Here are the flowers that made for filling the planter. Do you want a how to on them?

Have Fun

Hoping to have bicycle, fan and boat tutorial coming soon…which first?


Good morning bicycle sounds good!! And would love to make the flowers too please don’t forget about elf on the shelf !! Your tuts are really fantastic thank for sharing with us . 😊
LikeLike
TY! 🙂 I haven’t forgotten the elf on the shelf…been experimenting with silicon molding to get the details.
LikeLike
Yes please for the flower tutorial, fan, bicycle then boat! Love your work, Ellen
LikeLike
TY! 🙂 love the feedback!
LikeLike
Thank you on the Awesome planter!! Yes, please, on the flower how to!!
LikeLike
TY! 🙂 Flower coming soon! Thanks for the feedback!
LikeLike
Thank you so much for this. I have to confess I was beginning to have “Teensyweensy” withdrawals.
Great planter. Love the flowers ( look like anemone flowers?).Would love to see your tutorial.
Sweet kitty and butterfly.
. Seriously??? A bicycle please. 🙂
LikeLike
I know ….I was running late again on posting. I will try to be better to prevent withdrawals! 😉 LOL The bicycle has been cycling around in my head for over a year now….vintage with a basket that can hold flowers or small pet.
🙂
LikeLike
By the way, I have the Easy Cutter. I got it several years ago. By far one of my favorite tools. It has gotten me through all the floors and trim in 2 large houses, a toy shop and The Buttercup cottage kit countless frames, and it’s just now starting to dull.
Looking forward to seeing more of your amazing ideas!
LikeLike
TY! That info will help me decided on what to spend my gift card on. I have such a bad tool collecting habit. 🙂
LikeLiked by 1 person
Preciosa jardinera y las flores son una preciosidad. Gracias por compartir la idea.
LikeLike
Muchas gracias por la retroalimentación 🙂
LikeLike
Love the flowers. In South Africa we call them Cosmos.
LikeLike
Thank you! 🙂
LikeLike