
Whew, I almost didn’t get this one done in time to post for May….trying to stick to my goal of one tutorial a month. I just love the vintage lawn chairs and wanted to make a miniature version.

I can almost smell the fresh cut grass and taste the cold ice tea.
Supplies:
- card stock
- glue
- wire
- scissors
- xacto knife
- paint
- masking tape
- cutting mat
- round object like a dot tool, pencil or dowel.
- sealer
- wire cutter

Use the template above to cut out your card stock pieces. The template has enough pieces to make two chairs. Be sure to have a new blade in your xacto knife for clean cuts.

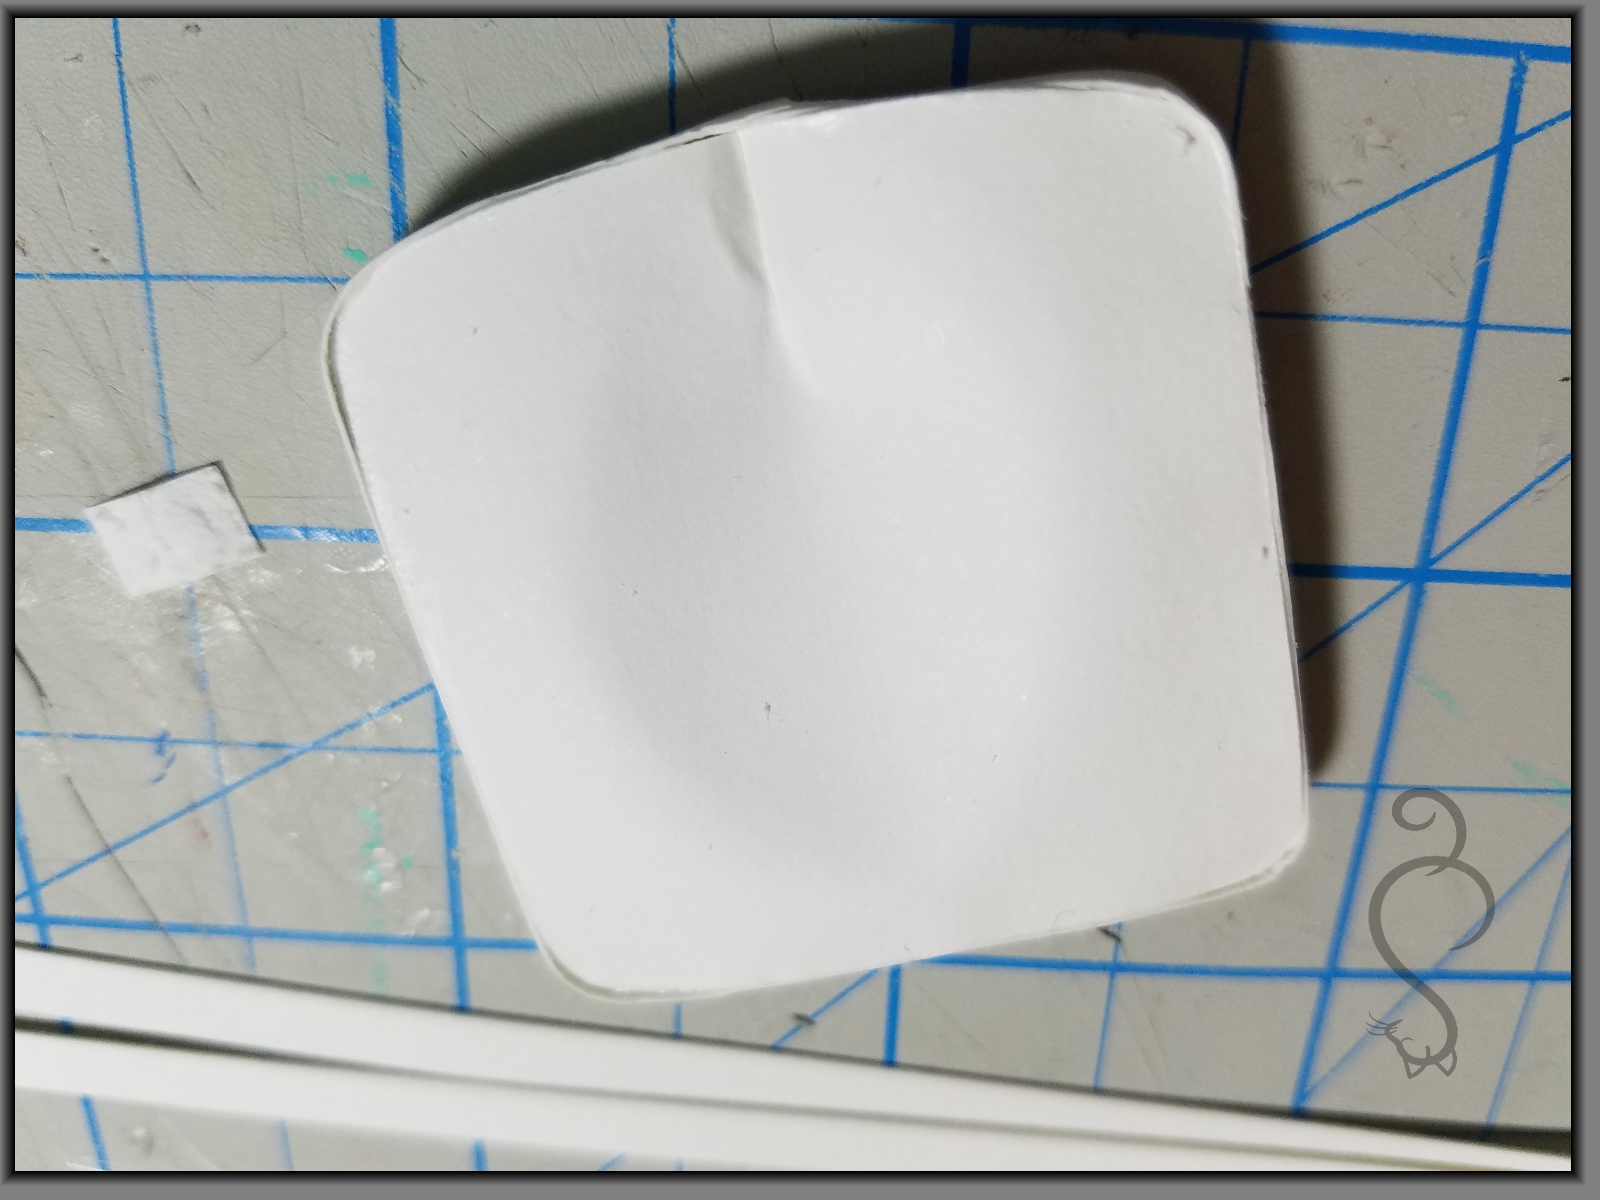
Take one of the solid back rest pieces and apply glue evenly across. Take second solid back rest piece apply on top of glue.


Line up edges as even as possible. Apply glue to the top evenly across Add the last back rest piece to the top…making sure all of your edges are even as possible. I used a cosmetic sponge to help spread the glue. You want to keep your fingers clean of glue as much as possible. All of those glue spots show up when you go to paint the chair.

Hold your thumb in the middle of the glued back rest and press between your fingers to create a gentle curve in the back. While your thumb is in place, gently curve the upper edge of the back rest down/away with your fingers.

Set aside to dry.
Now the bottom seat of the chair. Take one of the chair bottom pieces and begin to fold in half. But don’t actually fold. Pinch a tiny finger nail amount of the chair at the rounded edge and crease a dart.

While pinching, gently curve the four corners down/away. We are creating the small dip in the seat for bottoms.

Do this to all three pieces for the seat bottom.

Glue the three layers together. Be sure to keep the dart shape as you glue.


Let dry. If you have some small overlap at the sides , trim with scissors. Nail scissors are great for this step.
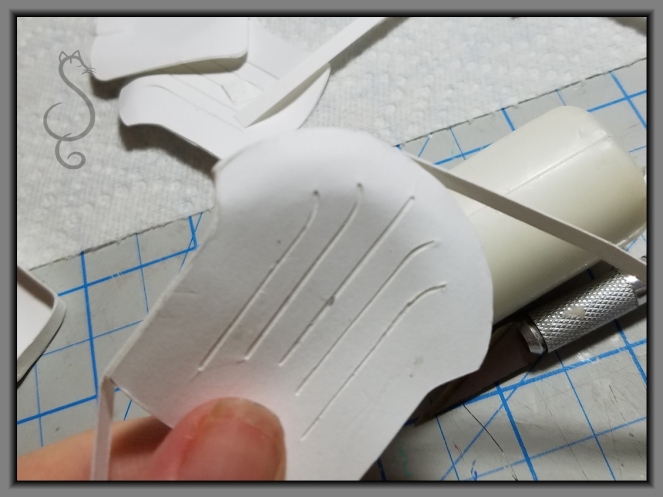
Cut strips of the card stock about 7/32″ wide by 7″. You will need two pieces. One for the back rest and one for the seat of the chair.

Run the strip through your fingers to give it a curve. Like curling ribbon.

Starting at the middle of the back of seat bottom where the dart is , glue the edge of the strip to the edge of the bottom seat all the way around to the bottom edge of the chair back. Creating a small over lap to glue together like in the lantern tutorial. https://teensyweensybaby.com/2016/10/26/miniature-dollhouse-lantern-tutorial/
I am also adding a video to help visualize the over lap gluing process.
Creation of over cardstock over lap for gluing

Because we are going around some curves, you may have some trim that extends above your seat. Don’t worry, just let the chair dry and then trim off the over hang with the nail scissors.

Next we’re going to add the trim to the seat back rest. Start gluing the strip’s edge to the side edge of the seat back rest. Start at the bottom of the side and go up and around the top to the bottom of the other side . Leave about an inch of trim hanging free on each side.

Let dry and trim with the nail scissors to even up.
Glue the back rest to the seat bottom with the bottom edge of the seat back lining up with the bottom of the seat back. The curve of the back rest follows the rounded edge of the seat bottom with the dart.
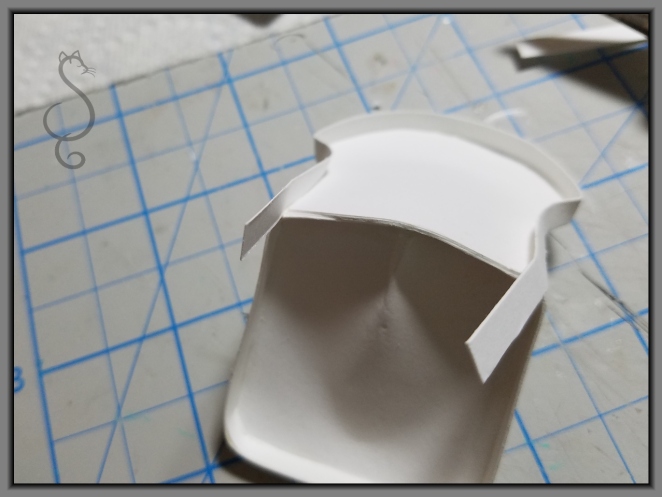
Finish the trim across the join with the overlap gluing for a clean finish.

Wire frame is next. I used some 12 gauge aluminum floral wire. Cut a piece about 16″.


Place your wire across the mat evenly on a horizontal line. Bend in a u shape just under two inches across. 
Use masking tape to tape to the mat. Lay your round tool across the wire at two inches below the top of the U shape and tape to hold.

Bend the two wires up 90 degrees. Be sure to hold the tool down as you bend.

Remove and position the wire with the 90 degree angle lining up on your mat on a horizontal line like below.

Again at the two inch mark bend the wire up 90 degrees. Remove and trial fit your chair. It should just fit.
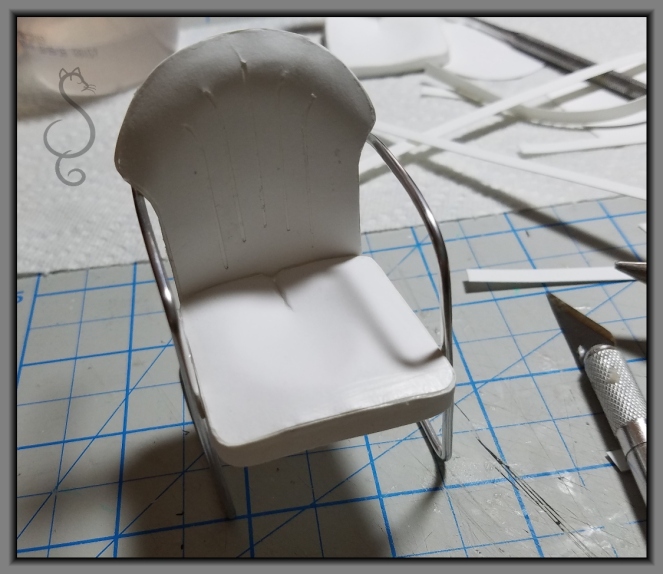

Trim the excess wire off with wire cutters. Your ready to make your second chair if you wish.
For finishing the chairs. Spray with a mat sealer lightly. I recommend that you use spray paint or air brush for painting the chairs. You can use acrylics, however, very thin layers and very little water or your chairs will warp. After drying, spray with a sealer or I used mod podge gloss since I was out of my favorite spay sealer. I think my husband stole it. It’s not possible that I forgot to get more. 😉
Have fun filled Memorial Weekend!
P.S. The table is 1 5/8th circle (three pcs glued together) with a 7/32 wide strip for the edge trim. Legs are the aluminum wire 4 pcs U shaped 2 1/4 inches wide/tall. Glued together to form the stand.


Tip Jar
Happy with the tutorials that I have posted and you wish to send me a little tip , here is the spot do do that.
$1.00


Ingenious!!! You have the patience of a Saint. Thanks for sharing. Happy Summer
LikeLiked by 1 person
TY 🙂 Happy Summer to you to!
LikeLike
This is the coolest tutorial! Incredibly clever and the chairs are gorgeous!!
LikeLike
Thank You! Happy you like it! 🙂
LikeLike
Faber tutorial! Thank you for sharing your minis projects with us.
LikeLike
I meant fab. Dang this auto text!
LikeLike
TY! Gail….happy to share!
LikeLike
Son preciosas, gracias por el tutorial
LikeLike
Thank you! 🙂
LikeLike
Super cute! :]
LikeLiked by 1 person
TY! 🙂
LikeLike
Smart idea and amazing effect 🙂 I like it! I made also chair but by the another way – from the plastic box (a box after ice-cream), anyway maybe some day I will use your tutorial 😉 Thank you. 🙂
LikeLike
TY! Aya 🙂
LikeLike
You have done an AMAZING job of duplicating these vintage lawn chairs. I have really enjoyed watching the process as well as reading up on some of your back blogs- What a TALENT! 😀
LikeLike
THANK YOU! So appreciated ! Happy that you enjoyed my little blog! 🙂
LikeLike
Fab tutorial. I have just subscribed to follow your blog, via Kris of 1 Inch Minis 🙂
Looking forward to seeing more.
All the best
Vivian
LikeLike
Thank you Vivian! Appreciated that you subscribed! I am so thankful to Kris for linking my tutorial to share with her followers.
LikeLike
excellent! I’m going to try it this evening. Thanks so much for sharing your work/ play!
LikeLike
Hello Ann in Austin. I would be thrilled to see your results! I have been wanting to make more in different colors. What color are you thinking of?
LikeLike
Génial votre travail, merci de le partager
LikeLike
Je vous remercie!
LikeLike
Have been looking for this type of lawn chair for ages! Saw some at Joannes Fabrics in the “Fairy Garden Section, but they were so clunky. Thank you so much for allowing 1 inch minis to post your link. Can’t wait to do this, but first I have to get more card stock, just ran out on last project. I just signed up to follow you.
LikeLike
Thank you for signing up to follow me! So happy to share. I am so grateful to Kris. My creative energy is getting such a boost. Hope to see how your project turns out!
LikeLike
Love, love, love this! And can’t wait to try it. I have a cousin who’s a big fan of these retro chairs. Thank you for sharing with 1″ Minis!
LikeLike
TY! Susan! I owe it all to Kris for being so generous and kind!
LikeLike
I signed up to follow your blog! You and Kris have inspired me to start making minis once again, using my gobs and gobs of supplies and stockpile of miniatures!
LikeLike
🙂 happy mini making!
LikeLike
¡Fantástico,gracias por el tutorial:-)
LikeLike
Gracias! 🙂
LikeLike
Well done! Adorable!
LikeLike
Thank You! 🙂 comment appreciated!
LikeLike
Thank you. Easy to follow! Found your link at 1inchminis. So glad I did!
LikeLike
TY! Renee 🙂
LikeLike
Hi,
Saw your tutorial (via Kris Compas) and just love it. I will be looking at your blog again. My dad and stepmom had these chairs. Theirs were red with white frames. Thanks so much for sharing this. Roberta Sheely
LikeLike
Hi Roberta! Thank you for stopping by. I almost painted my mini version red…such a classic color for the chairs. 🙂
LikeLike
It looks so easy! Love the chairs. I’ll give them a try!
LikeLike
TY! 🙂 Share a picture when your do!
LikeLike
Wonderful idea! Thanks for sharing!
LikeLike
TY! 🙂
LikeLike
Thank you for sharing!
LikeLike
Thank you for stopping by. Brings a smile to my face. 🙂
LikeLike
such a terrific idea and I love your photos and directions. I should try to make some for my squirrels.
LikeLike
Such a cute idea lawn chairs for squirrels🤣
LikeLike