
A miniature typewriter tutorial. This little typewriter is mostly made out of paper and some bits you might have laying around if you sew.
I had a delay to getting this tutorial done. I had taken a photos on my phone all day and that evening I transferred them to my computer. All looked well that night. But in the morning viola all the files were corrupted. So, back to the beginning again, I went. Number three typewriter!
Let’s get started.
Some things you will need:
- cardstock (black, white and choice of color)
- glue (I used thick and tacky)
- scissors
- snaps
- wire 32 gauge
- seed beads 4pc
- earring backs
- toothpicks
- woodsies (unfinished matchsticks)
- silk ribbon
- 1/16 dowel
- mattboard
- xacto knife
- ruler
- paint
- clear nail polish
- matt spray sealer
- decal (optional)
- embossing powder (optional)
- jewerly head pins
- hole punches
- dremel diamond cut wheel …or sand paper
- super glue gel. I use gorilla glue
- wire cutters
- tpin or drill bit
- embossing powders optional
- embossing heat tools optional
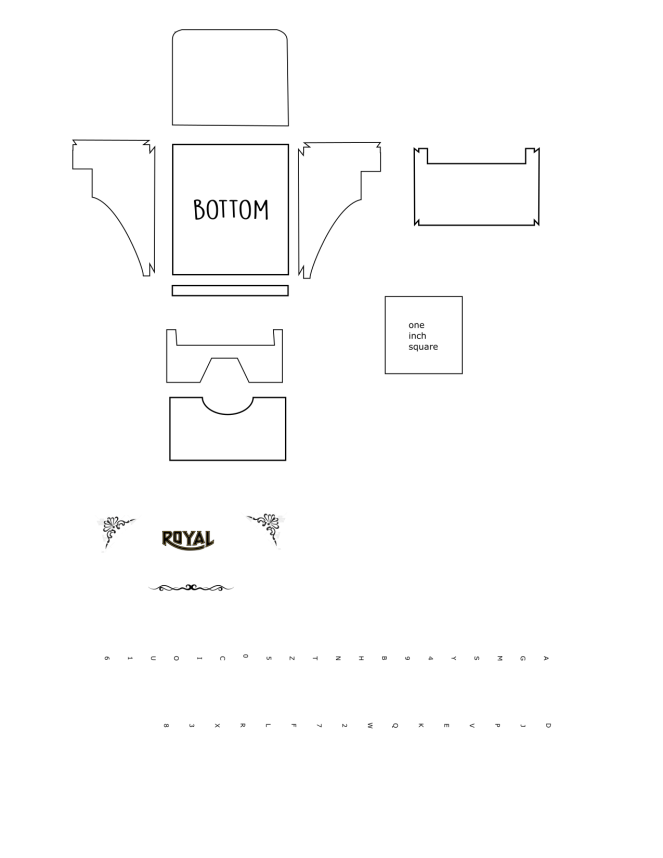
The above file has the outlines for the parts of the typewriter , number and decals . Print out the parts on card stock of your choice. I usually use a color of card stock that is close to the finished color that I want. For example for the red typewriter I used red card stock.
Cut out your parts carefully with your xacto knife. Using a metal ruler lightly score along the edge of the tabs on the side part. You only want to go through the first layer of the card stock. Remove the top layer.


Do this to the other tab at the bottom edge and then fold both tabs at a 90 degree angle. Follow the same direction for the other side part. Be sure to do the opposite side or reverse of the first piece.

Glue the sides to the base.

Trim the tabs on this divider. Removing the one layer of card stock from each tab. Bend at a ninety degree angle.
Glue in place.
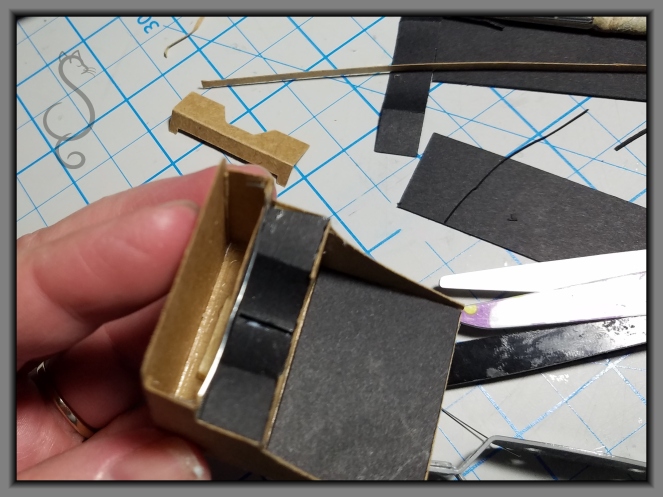
Add a black piece of card stock to the front/facing side of the divider.
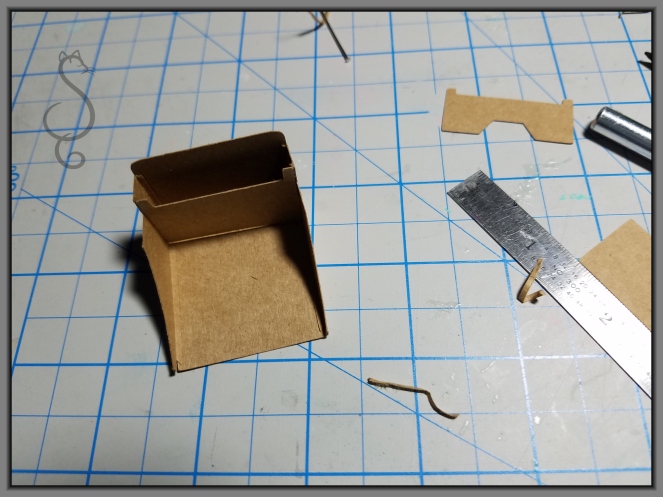
Cut four pieces of woodsies (unfinished matchsticks) to fit just behind the next divider.

 They are approximately a quarter of an inch in length. Put two at the bottom edge and two at the top.

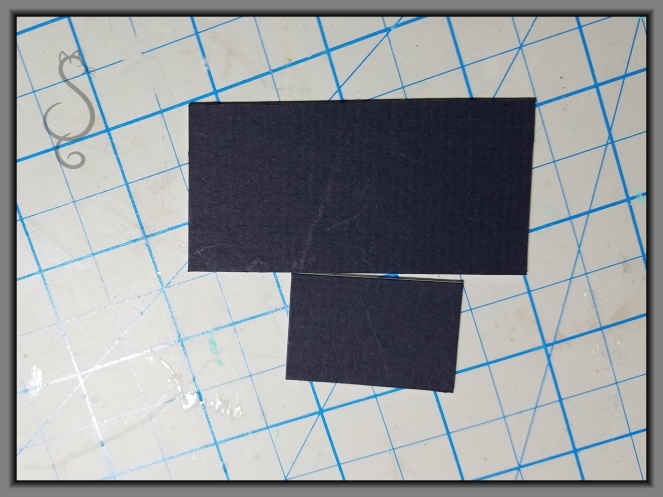
Cut a strip of black cards about 1/3 inch wide by two inches. Check that the width is not too big. Form the strip to follow the top edge of the second divider. Trim as needed.

Dry fit the piece before you glue in place.
Cut a piece of black card stock to fit into the bottom of the type writer. I missed a couple of pictures here.
Fit the strip of card stock to the front edge of the typewriter.

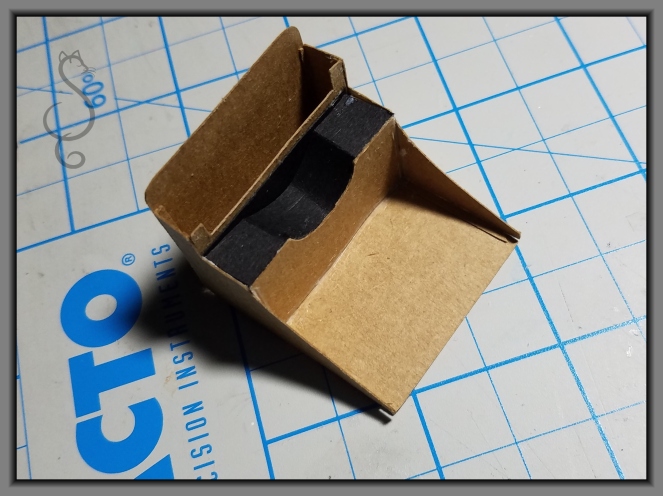
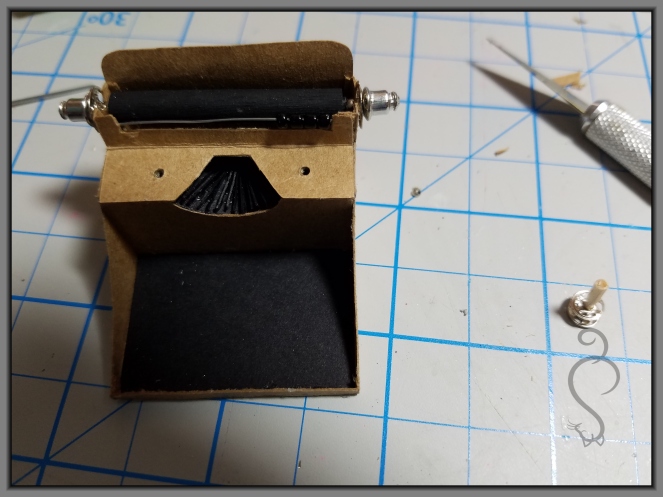
Pierce a hole at the top of the first divider. We are going to make a mock paper bar. Cut a length of wire to go across and through the holes. Add four small black seed beads . These represent the roller bars. Trim and bend the wire edges inside.
Cut some tiny strip of about 1/3 in wide black card stock. These are going to be our /mock striking keys.

Start in the middle and glue upright your first piece.
Fan the next pieces to either side.

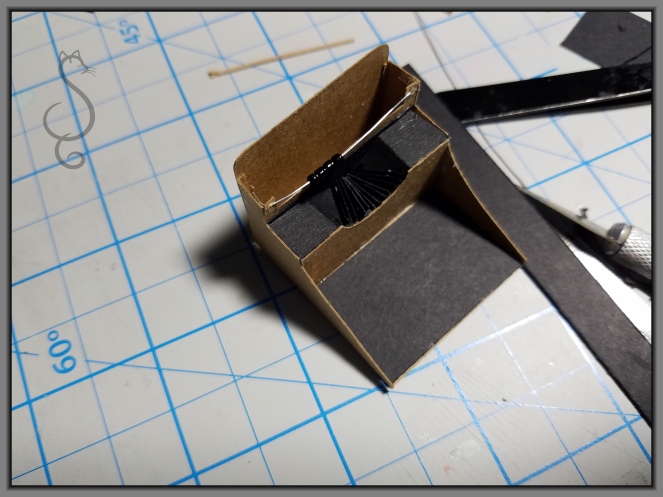
Measure down from the top approximately a quarter inch . Fold at a 90 degree angle the top cover. 
Dry fit and the glue into place.
Next cut some notches at the sides to allow for the paper carriage.

Cut a 2″ piece of the 1/16″ dowel. You can cut the dowel by rolling your xacto knife back and forth.
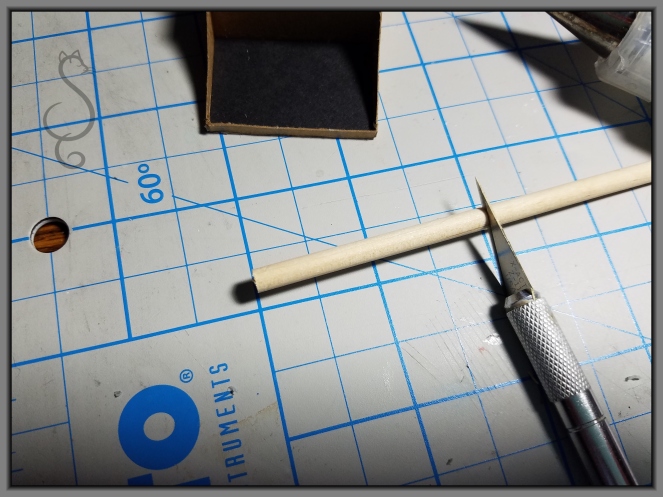
Score 1/4″from each end with your xacto knife .
Use your xacto knife and a little bit at a time a trim the end down to 2/32 approximately.
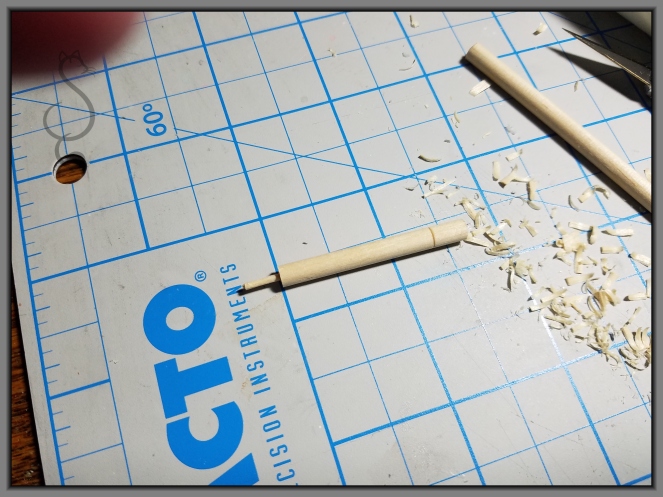
Do both ends.

Trim down to 1/32 at both ends from 1/16 to the ends. This will make sense soon. You now have a rolling pin…ha…not really.
Test fit the carriage.

Paint black.
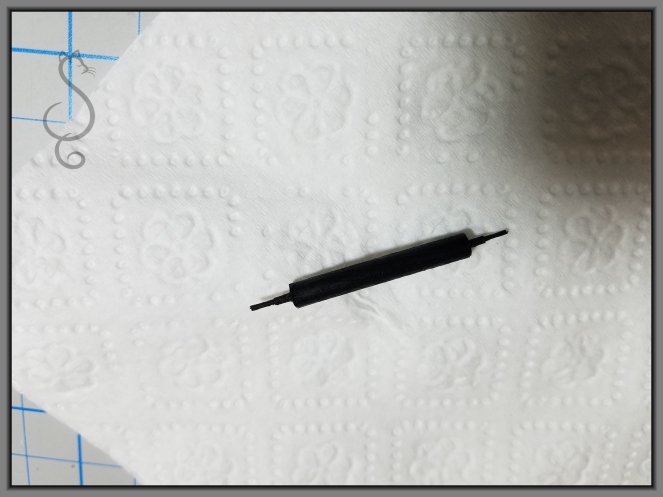
Get two of the male parts of 1/4 inch snaps.

Using a dremel diamond wheel, cut off the ends of the male snaps. One for each end.

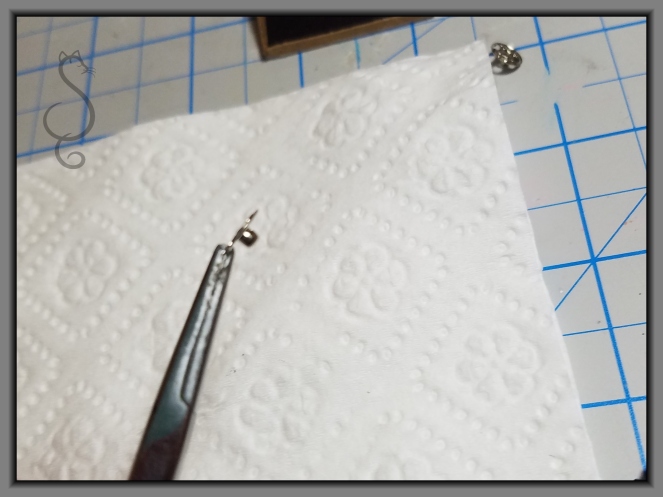
Slide onto the carriage with the flange facing towards the outside .
Add pierced earring back. Trim to fit flush and glue with super glue.
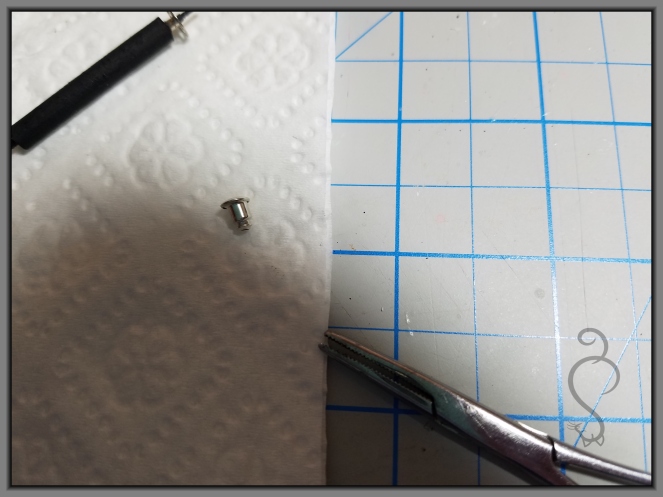

Test fit once more.

Next is cutting some matt board for step risers.

Make the first riser to fit inside
The second riser just 3/16 short…like the picture above. Third riser again 3/16th shorter and then a fourth riser 3/16 shorter.

Glue together the matt board risers. Don’t glue into the typewriter yet. I found it easier to work on and paint not being glued into place. Cut a piece of matt board to be about 3/32 by 1/2″ to be your space bar. Glue on the first riser in the middle.
Wire cut about 46 to 50 of the head pins to be about 1/16″. These are going to be your keys.

Use t-pin or drill to place hole for the head pins. Glue in the head pins.

Paint the riser and pins black.
Punch out of black card stock about 50 5/64″ rounds. You will lose a few. Don’t breathe to close. I used by leather hole punch on the smallest setting.

I used a piece of painters tape to hold them in place so I could breathe.
Print out the letters and numbers on white card stock. Punch out the letters and numbers using 1/16 round punch. I used a punch from Martha Stewart collection called lace doily.

I cut the letters and numbers into strips and then I could line up the letters one at a time looking through the bottom and then punch each one out. Fun right? For about the first minute or so..lol.

Glue the letters and number in the center of the black rounds. Then glue them onto the top of the head pins on your risers.

I then used clear nail polish to seal the keys and add some shine.
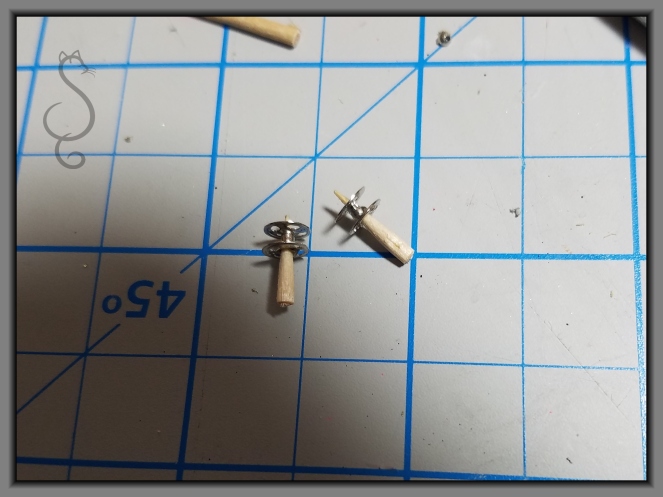
Next we are going to make the ribbon reels.
You will need four of the 13/64″ snaps. We will use only the male half.
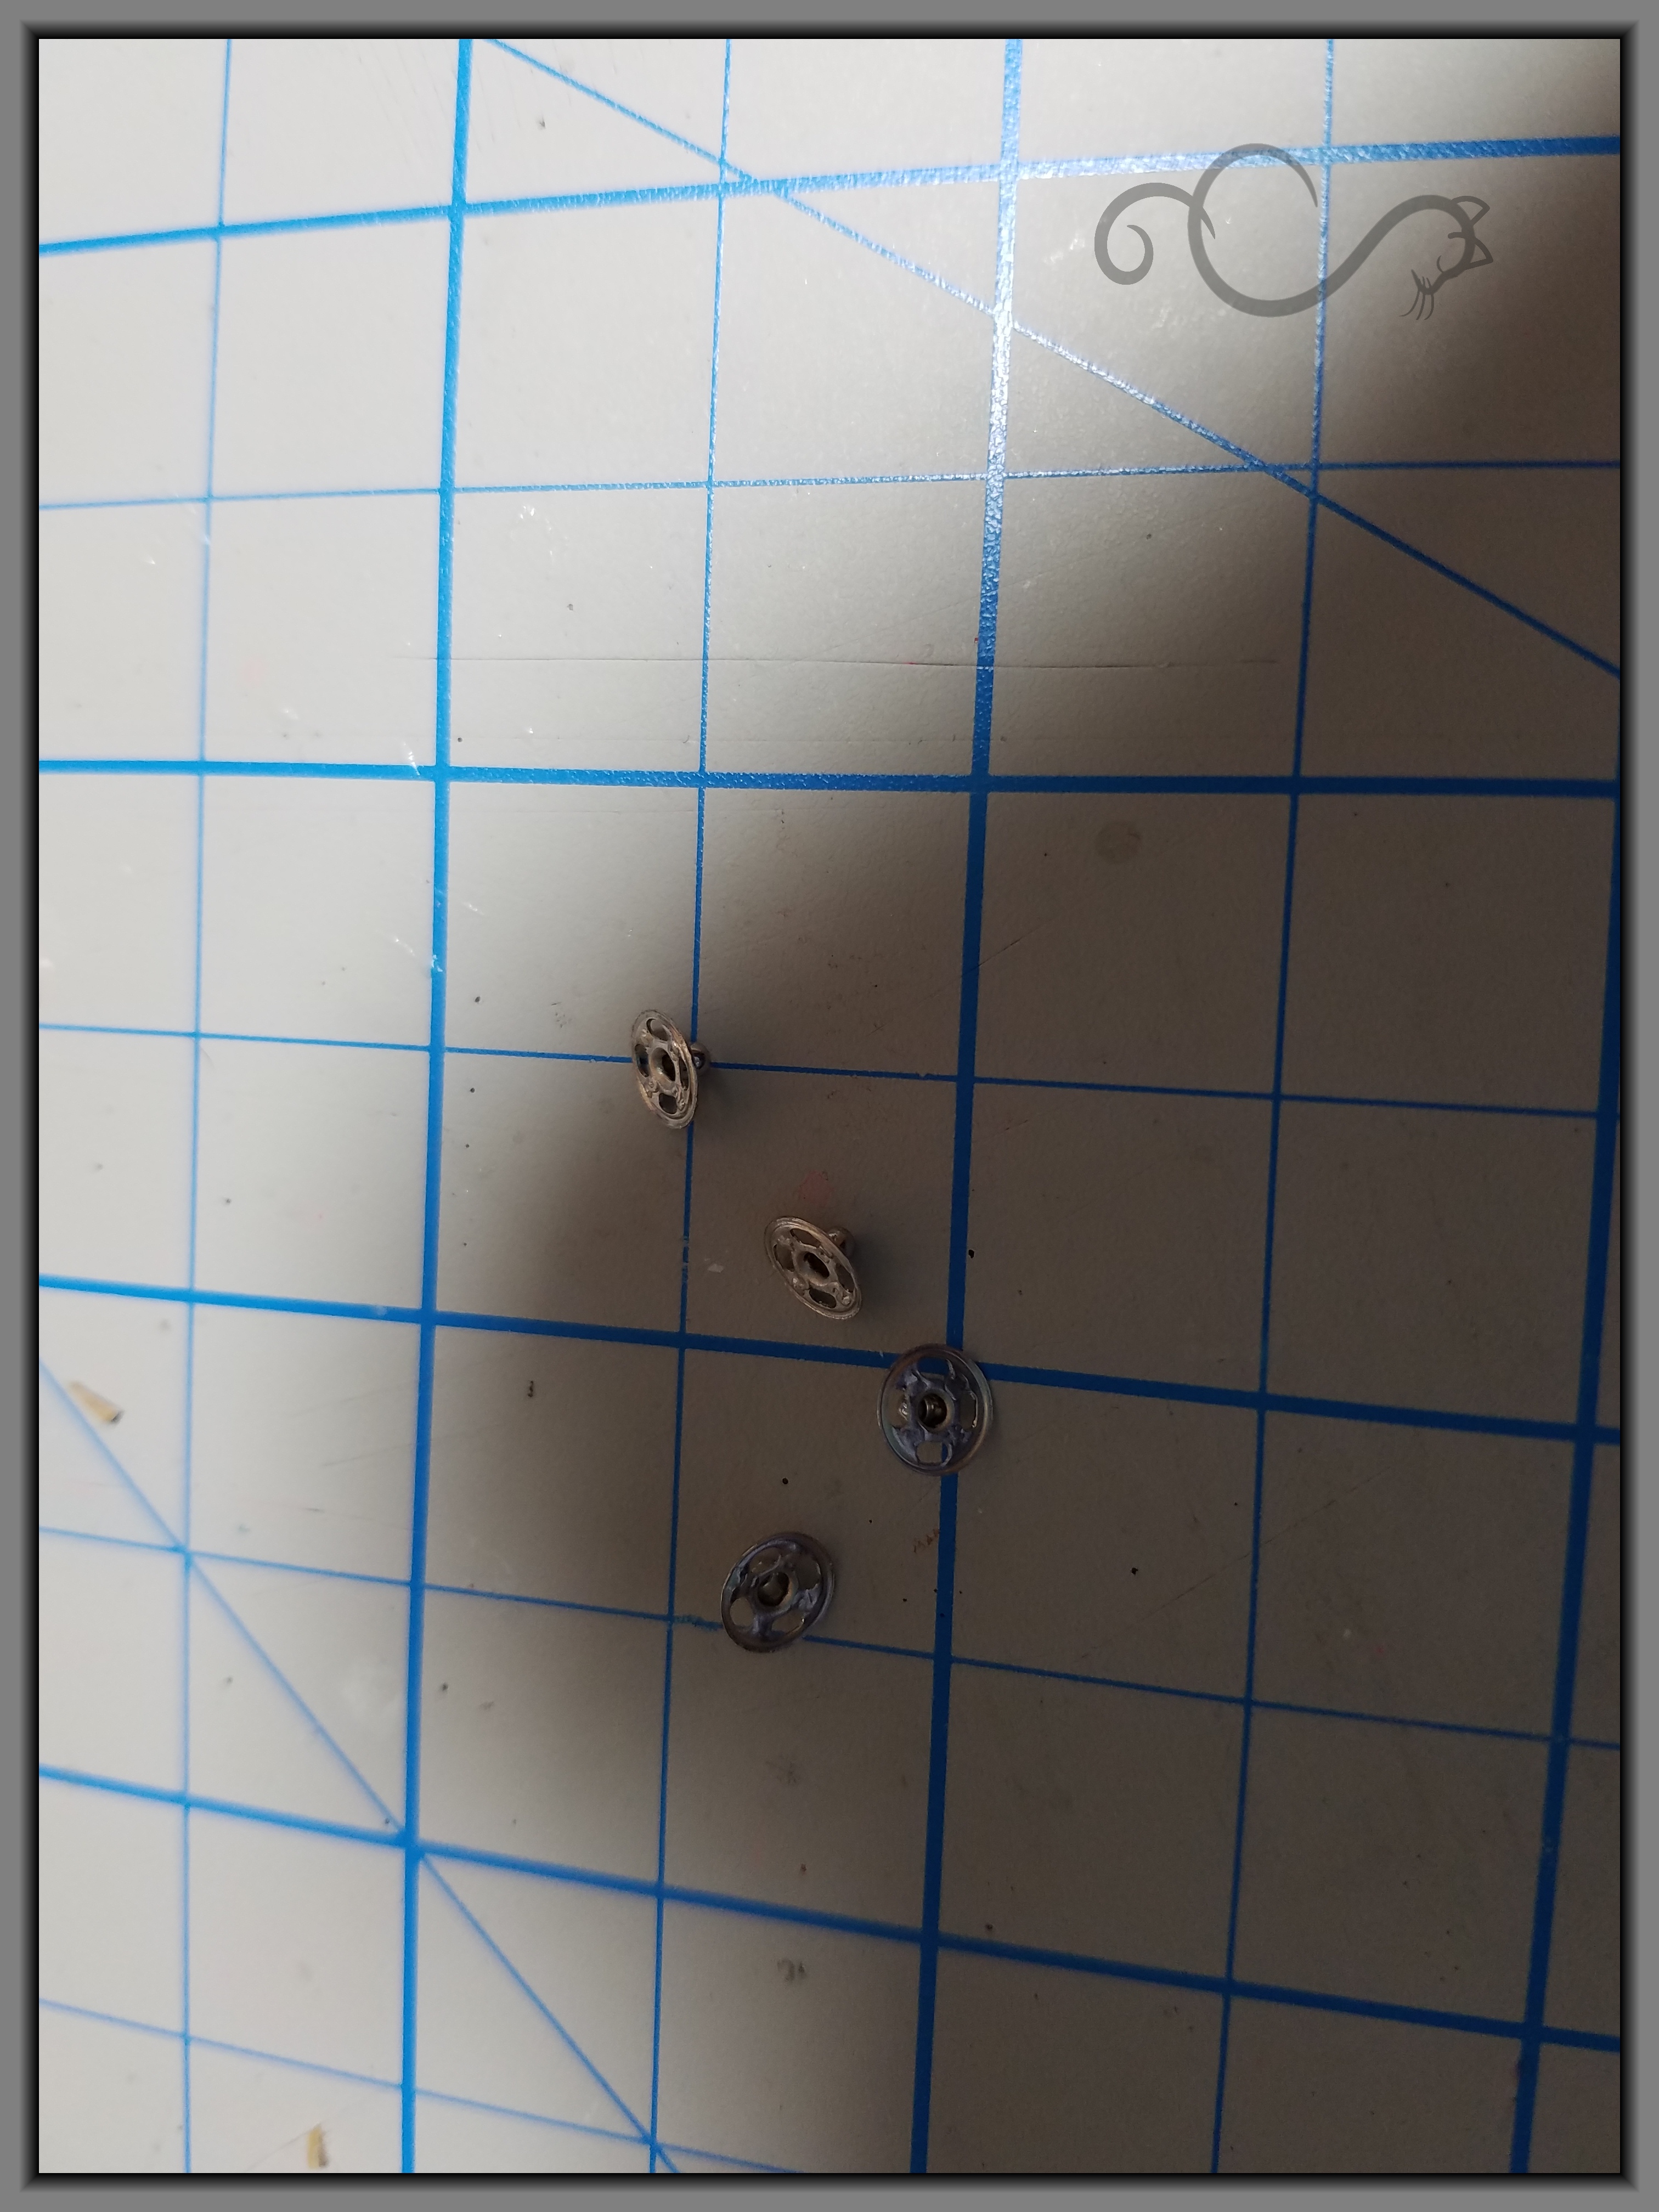
On two of the parts, use dremel diamond cut off tool or sand paper to take just the end of the nipple. On the other two cut off the entire nipple.

Use a toothpick and thread one of each snaps on the end.

Trim the excess toothpick off at the top. Use exacto knife to cut the toothpick about a half an inch below the ribbon reel. Make two.
Cut off a length of 1/4″ silk ribbon. I happened to have some off white in color. I then painted the ribbon with black acrylic paint and let dry.
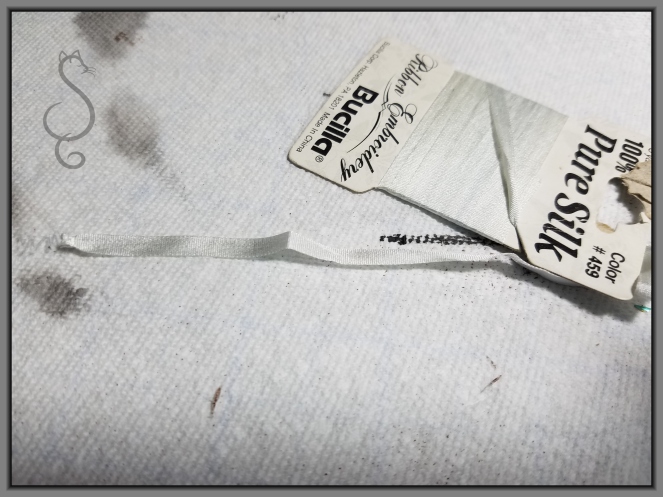

Cut down the length in half. Wind one half onto your ribbon reels. One from each end.

You could paint the top edge of the ribbon red before you wind them for added detail. I liked them all black.
Pierce two holes on the top cover for the ribbon reels.
Test fit.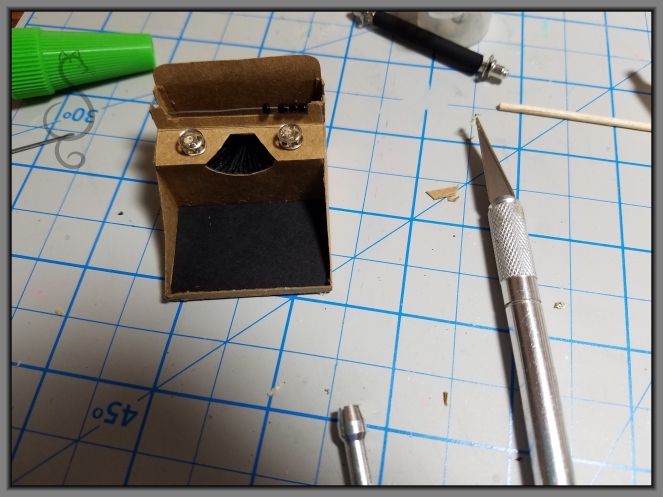
Cut a piece of wire about 2″ in length.
We’re going to form a frame for the ribbon. A little hard to explain so..here’s a picture to show how to form.

Trim off to be about 1/3″ length. Test fit the ribbon. 

Insert the tail of the wire in between the cover and the divider in the center.
Now you ready to finish up your typewriter. I take the key risers, ribbon reel and paper carriage off and set to the side. I spray the typewriter with a matt clear sealer . This helps the card stock from absorbing liquid and warping.
I did three different finishing on my typewriter. On the red typewriter I followed up with a coat of red acrylic paint. Once dry, I applied Ranger thick clear embossing all over. Adding layers and sanding in between. I then printed out the decals on decal paper and applied to the typewriter. Finished up with a clear sealer. Note: The ranger embossing powder has a yellow cast to it. The yellow will taint light colors.
On the Aqua typewriter, I painted with aqua acrylic paint and hand painted the details. I applied clear nail polish for high gloss finish.
The finial typewriter, I painted a copper acrylic base color. Applied zig two wayglue to the outside surfaces and allowed to dry til it turns clear. It becomes tacky.
I then covered in copper embossing powder.

Used an embossing heat tool to melt the embossing powder. I then followed up with clear nail polish for a high sheen. I really wanted a nice bright copper, however, the color turned out much darker than I wanted. I will have to try again.
Happy typewriter making!


Good job you are very talented!!
LikeLike
TY Verity! 🙂
LikeLike
Impresionante. Son una verdadera preciosidad.
LikeLike
Muchas Gracias! 🙂
LikeLike
You are phenomenal. Such an eye for detail. Just so you know, I came into work today,after yesterday’s snow storm (my computer at home bit the dust) just so I could view this.
I am not sorry I did. Thank you.
LikeLike
Totally Welcome! So pleased! Made another morning for me!
LikeLiked by 1 person
Wonderful Project! Love your blog.
LikeLike
TY Gail 🙂
LikeLike
Fantastic tutorial! Thanks for sharing.
LikeLike
TY Dora Hed! 🙂
LikeLike
Wow! What attention to detail! Love them!
LikeLike
Thank you! Delighted that you loved them!
LikeLike
So-o-o-o intricate. AMAZING!
LikeLike
🙂
LikeLike
Absolutely Remarkable! The authentic tiny details on your typewriters are Amazing to behold! 😀
LikeLike
Thanks Elizabeth. 🙂
LikeLike
I love great approximations. Especially handmade ones! The super-real stuff is kind of creepy. Thanks for the instructions, thinking about giving this a try! Glad I found your blog!
LikeLike
TY! Appreciate the feedback! 🙂
LikeLike