

Hello…as promised a tutorial for the dollhouse miniature lantern. This turned out to be more involved then I thought and therefor took way more time to complete.. My hat is off to all the people who do tutorials and share.
A little background on the method used for making this lantern. If you haven’t heard of Kris Compas and her website http://1inchminisbykris.blogspot.com, you must visit the site. You will be amazed. I know I was. The idea that the miniatures are mostly paper card stock, mat board, thread, paint, glue and sometimes wire, will inspire you to create. No running to the store…you probably have the supplies on hand and can dive into making something right away. The freedom to create and not break the budget. There was something intimidating to working with wood that held me back and when I found Kris’s blog, I was able to create and not be afraid to make a mistake as there was always more paper and glue on hand to try again. So a big thank you to Kris Compas for sharing!
Supplies:
- cardstock
- glue
- thread (regular, button, quilting)
- wire 30 gauge (optional to use music wire)
- xacto knife plus mat
- circle template
- tweezers
- ruler
- 1/4 hole punch
- toothpicks
- ball stylus for shaping
- pliers
- drinking straw
- sharpie ( for wrapping around)
- various sized round items for shaping the pattern pieces. I found that paint brush handles worked well.
- printer

I ended up making about five of the lanterns developing this tutorial. I found that each time there were variances to my cutting and shaping. So I just cut a few more circles in varying sizes bigger and smaller to the sizes on the pattern to have what I needed on hand. I put a few extra circles on the pattern sheet.

We will start at the bottom of the lantern and work our way up. You’ll want to print out the pattern sheet (there is a square on the pattern sheet, be sure that your print out has the square measuring one inch) and transfer to a piece of card stock and with a sharp xacto knife, cut out your pieces. You can also lightly tack your pattern to the card stock with some repositionable glue to cut the pieces. You can also print directly to your card stock. If you so wish. Take your time and try to be as close as possible to the pattern. I try to use a color of card stock that will blend in with the finished color. I found it hard to paint the inside of the lantern that shows when assembled.
Here is a simple outline drawing to help visualize the pieces.


The above photos shows the basic pieces needed for the bottom portion of the lantern.
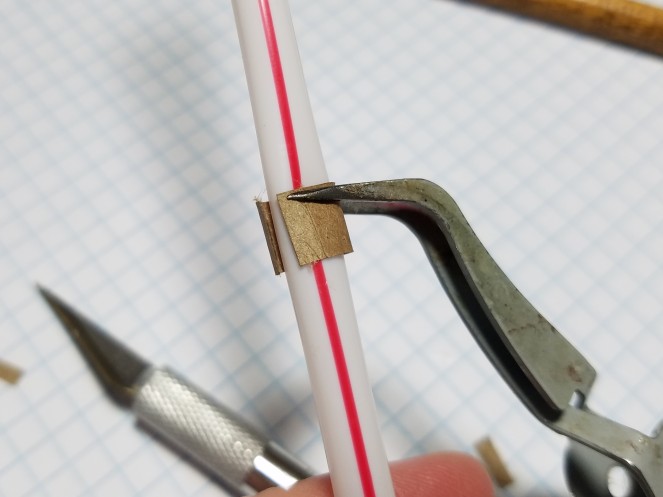
Wrap the 0.313 rectangle piece of cardstock around your sharpie. Right below the cap. My sharpie measures 7/16 of an inch right below the cap. I use my finger nail to lightly press a seam line where the edges meet and then cut at least an eighth of an inch past the crease line.

Hard to see, but there is my crease line on the right side. Now you are going to lightly score the crease line with your xacto. Lightly, you only want to go through the first layer of your card stock. 
Once you have you score line, use the xacto blade and separate the layers of your card stock.

Remove the top layer of your split. With the score line it should easily come off. Flip your piece over and lightly score the opposite edge. You can use the piece that you removed from the front to measure for your score line. Score lightly, split and remove the top layer.


Your piece should look similar to the above photo.
Apply some glue to one edge flap and wrap around the sharpie . Over lapping the two flaps. The two score lines should meet and the two flaps should overlap and become the same thickness as the rest of the cylinder shape. You will use this method for all of your cylinder and cone flange shapes.
You have your first piece completed.
Here’s a quick video of the process Cardstock over lap for gluing video
T
The next two pieces, (.483 circles) should fit inside your cylinder shape. Test fit the pieces. If they fit snug, you can apply glue to the inner edge of the cylinder at the bottom and put both pieces into the cylinder. If your pieces do not fit snugly, then measure the opening with your circle template and cut out the size you need and then glue them into the bottom of the cylinder.
Next use the ring (0.875 OD X 0.765 ID). Cut a small pie wedge out of the ring.

Use the neck of a ball stylus tool to shape the ring. 
By rolling the neck of the stylus tool with the card stock ring pressed up against the pad of your finger, the card stock ring will roll up and shape like a cone.

Dry fit the cone ring around the base of the cylinder. Tweezers come in handy here.
Just like the cylinder, you will want to mark where the edge should meet add an extra eighth inch and trim. Follow the same method for creating the over lap flaps as the cylinder and glue with the bottom edge of the cone and the cylinder level with each other. Try and always have the seams of your pieces line up at the back of your lantern.
Use the 0.875 x0.675 ring to create the cone shape for the top of the cylinder.
Fit the cone ring to the top of the cylinder base. You are going to want the large end of the cone to butt up to the top edge of the cylinder base. Just like the cylinder, you will want to mark where the edge should meet add an extra eighth inch and trim. Follow the same method for creating the over lap flaps as the cylinder and glue.

Glue on top of the cylinder.

Now glue the 0.50 circle to the bottom of the cylinder. In the picture above, you can see where I am lining up my seam lines to be at the back of the lantern.

Use a 0.328 circle to glue into the top of the cone.


Here is where the thread comes in to play. Cut a length of the thread off your spool. You can choose which ever thread you prefer. The thread covers the joining of the pieces and mimics the trim or solder bead of the lantern. Each thread has a little bit of difference in thickness. Regular thread, hardly shows, button or quilting thread show a little more. Cut a length of thread and run the thread through some glue. I usually use the quilting or button thread at the seams where I want a little more bead/trim accent. Like at the bottom edge.

I keep a damp paper towel on hand to wipe my fingers on. You don’t want a lot of glue stuck to your lantern. Toothpicks also make a great tool to remove excess glue. Use the tip to remove and wipe on your damp towel.
Add thread to each edge or joining having the ends meet at the seam lines.


Take a tooth pick and trim off approx 1/4 inch. Wrap the one edge with the 0.063 trim to mimic the cap.
Using a needle tool or a drill, drill a hole in the front of the base. Opposite of the back seam. I use my ball stylus tool to help enlarge and shape the hole.


Glue in the tooth pick.

Next is another cylinder shape.

Using the 0.188 strip. Wrap the strip around a round object to make a 3/16 cylinder. I used a brush handle for this shape. Use your circle template to help find the right object to use. Create your over laps and glue. Glue the cylinder in the center of the top circle.

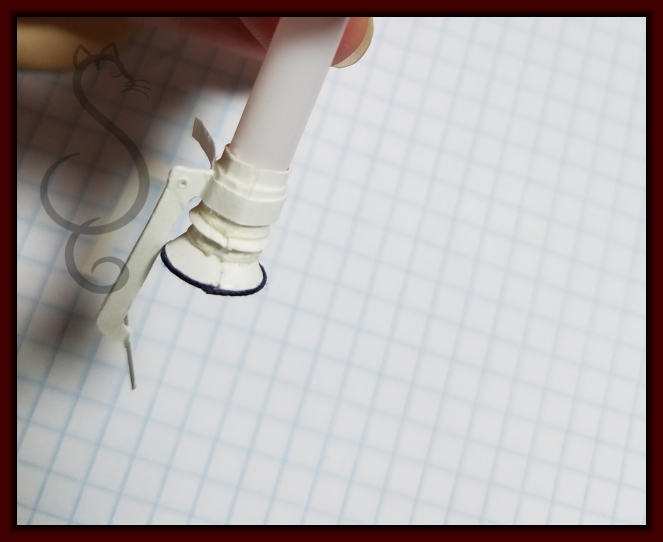
Next use the 0.875 x0.765 ring to create the flange/flare cone. This cone fits over the neck and rests on top of the base.
Use your quarter inch hole punch and punch out a piece. Trim with the 0.125 strip.

Glue on top of the neck.

Finished with the bottom half.
The picture below shows the basic shapes for the upper chimney/vent of the lantern.

Grab an object that will make a 13/64 cylinder. I used a drinking straw. Use the 0.375 strip to make a cylinder.
Use the 0.875 x 0.675 ring to make the flange/flare cone that buts up to the edge of the cylinder. Ignore the color of the piece. I was taking pictures during several different lanterns.

Glue some button thread around the bottom edge of the flange/flare cone.
Use the 0.188 strip and make a cylinder cuff shape to fit around the first cylinder shape.

Drill vent holes just above the join of the cylinder and cone/flare. 
I drilled 8 holes evenly spaced around.
Use the 0.875 x0.800 ring and create a flange for just under the cuff. Trim with thread where the flange meets the cuff.
Next grab 4 pieces of the bracket shapes.

Glue two pieces together. Apply glue only in this area.


Make some holes for the wire hanger.
Press open the two brackets like so.

Split the card stock on all four “limbs of the bracket” and remove the inner pieces.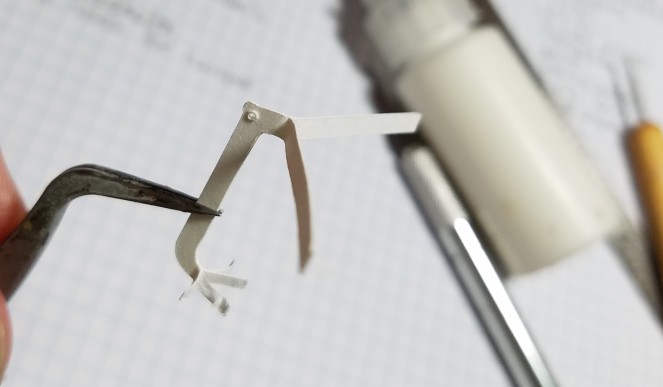
Next we are going to “hug” our top brackets around the top cylinder cuff shape. 
Mark with the brackets meet. Do this for both of the brackets. Cut off the excess beyond the marked crease on both bracket arms. The picture shows one being cut. Do both.

Glue the arms of one bracket around the cuff. “hug” I tried to be sure that the seam lines ran about half way between the brackets being glued.
Glue the other bracket on the other opposite side “hug”over the other arms hugging. I missed getting a picture of this. My apologies.
Next glue the bottom of the lantern into place . Lining up the fill spout in between the brackets

0.281 Circle and two 0.203 circles and use a stylus to round out.
Cut for approximately 1/4 long pieces of the 0.063 strip.


Glue the four pieces in cross pattern to the bottom of one of the 0.203 circles. Turn over and glue to the center of the 0.281 circle

Bend the pieces up 90 degree angle. 
Glue into top of the top cylinder. Glue the remaining 0.203 circle to the top.

Next step is to glue thread trim to the sides and middle of the brackets.

Hard to see.

I added red lines to help see the pattern to glue the thread. The center thread line will need to be added on both sides of the lantern’s brackets. The other thread lines are placed on the edge and can be viewed from both sides of the lantern.
Almost there now.
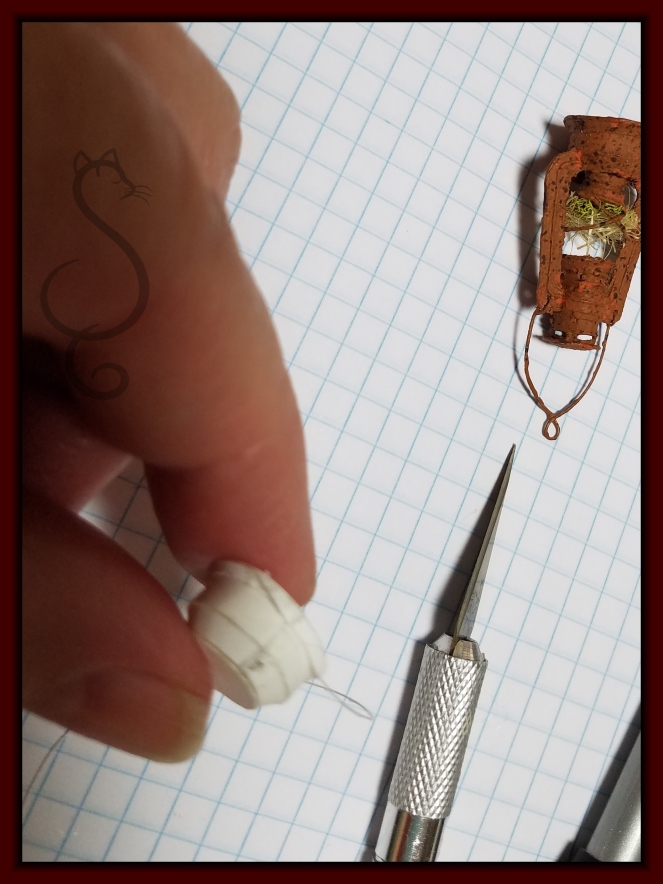
Grab your wire and lets make the glass bracket. Cut a length of wire. Maybe about four inches. Wrap the wire around and make a center loop about 1/4 inch round. Over lap the loop about half way . Place at the bottom of the sharpie pen.


Bend the wire around the front of the pen. Crossing in the center.
Turn around the pen and do the same to the other side. Almost like you would wrap ribbon around a angel wing costume. Across the chest , under the arms and around the waist.
Trim off the excess wire.

I soldered mine to keep the shape. You can secure by wrapping thread with glue around the contact points or wrap thin wire. Place onto the lantern.
Cut another piece of wire approx 3″ length. Make a center hanging loop. I wrapped the wire around my needle tool. Measure 1″ from the center loop and cut the excess off.

Use your round nose tip pliers and make loops at the ends. Like question mark shapes.

Last piece. Whew…
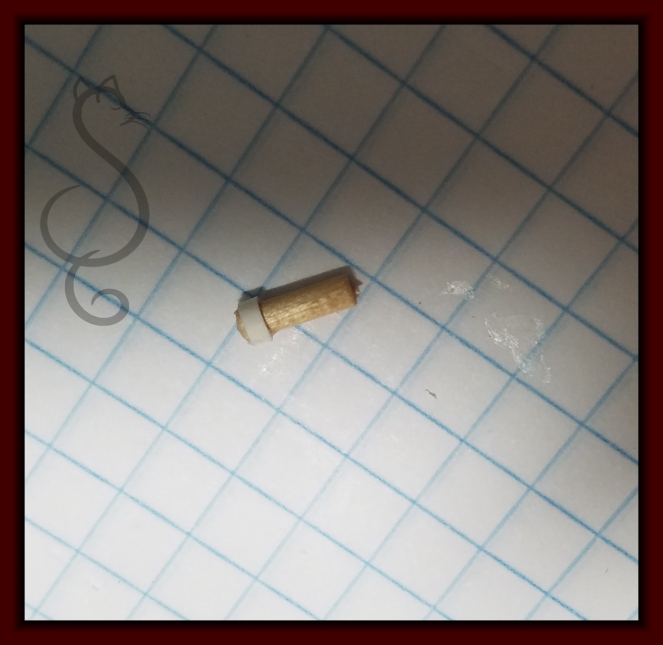
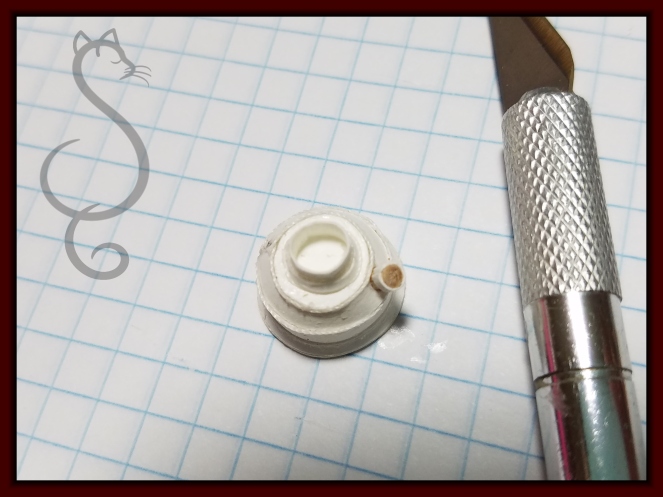
We need to make the little key for the wick. Cut a small piece of the wire. Use your round tip pliers to bend the shape. Trim stem to about 1/8″.

Use your needle tool or drill to make a small hole in the neck of the lantern. Glue the key into place. 

Finished with assembling.
I sprayed my lanterns with a fixative spray to help seal the paper before painting.
Then the fun begins. Have lots of fun painting your lantern. So far I have Silver, Red, Copper , Rust and black. Want to make one like enamel ware. I have a rust paint tutorial below.
Miniature Vintage Style Bottle Holder Garden Accessory Tutorial


I got carried away and had to make a lantern with faux glass shade and battery operated light.
Well, I hope you enjoyed and everything made sense. Have a great day!


Amazing! Thank you so much for sharing. I can’t even imagine how much time and effort went into this tutorial. Love it.
LikeLike
TY! Appreciate the comment. Helps me have the energy to keep posting. You made my day once again!
LikeLike
Could you instruct us on the battery operated lantern-how do connect the battery to led light?
LikeLike
I will try and add some quick instructions for the led battery set up as soon as possible. Bear with me as this year has been a doozy.
LikeLike
Increible
LikeLike
Thank You 🙂
LikeLike
I’m so happy that someone is actually taking time to show us beginners & I’m sure people with experience enjoy it too. Thank You for the taking the time to teach us how to make a lantern .
LikeLiked by 1 person
Hi Marie…TY for commenting…it really gives me more incentive to keep it going.
LikeLike
Absolutely fabulous!!!!Thank you so much!
LikeLike
🙂 Many Thanks!
LikeLike
Hi There. I am the editor for American Miniaturist and Dollhouse Miniatures magazines and would love to share some of your tutorials with our readers. Please email me at auralea@ashdown.co.uk if you are interested. Thanks! This lantern one is crazy awesome!!
LikeLike
Auralea Krieger Sent you an email from my personal address
LikeLike
Brilliant tutorial, you explained everything so beautifully. Thank you
LikeLike
TY! 🙂 Happy to hear that!
LikeLike
HOLY MOLEY ! what a tutorial !! Thanks so detailed and perfectly pictured
LikeLike
TY! 🙂 🙂 your comment made my day!
LikeLike
You’ve got some MAD SKILLS- WOW!
LikeLike
Thank you…so sweet of you to comment! 🙂
LikeLike
Fantastic tutorial. Can barely wait to try it myself. The lantern in the video actually looks lit. What type of wiring, bulb, lighting did you use? If you don’t mind sharing.
LikeLike
Hi Phylllis! Yes, I did set up one of the lanterns with a light. I will dig it up and write it up to show you as soon.
LikeLike
I just LOVE your blog. I’m making a Gnome home and this will be just perfect. Thanks for making a great tutorial.
LikeLike
THank You! Lucy Will love to see the lantern you make for your Gnome home. On my to do list is a tutorial to light this lantern and the glass too. 🙂
LikeLike
Fantastic tutorial. Thank’s so much for all your hard work.
LikeLike
Thank you for bringing a smile to my face! 🙂
LikeLike
I know I’m late to the party, but I just cut this whit my cricut machine and I’m super excited to follow this tutorial. Thank you so much for putting this all together you have immense talent!
LikeLike
Better late than never 🙂 Hope you have fun making the little lantern. Thank you for your kind comment.! 🙂
LikeLike
Bonjour
Je découvre votre travail! Je suis totalement admirative!!
Je débute tout doucement dans les miniatures. Puis je vous demander quel type de papier cartonné vous utilisez ? Quelle épaisseur est la plus adaptée pour ce type d objet ?
Merci et au plaisir de vous suivre.
Anne
LikeLike
Bonjour Ann,
Le type de papier cartonné que j’utilise est léger 65lbs 176 gsm. Comme pour les affiches ou les cartes de vœux.
Passe une bonne journée,
Tina
LikeLike