
My apologies..for the blurry pictures…my camera decided not to cooperate!
I love tiny baskets …so this is my way of making a little chip wood basket.
I bought some wood veneer off of ebay thinking of trying my hand at wood inlay. Once I looked at the veneer, I thought is was the perfect thickness for making some chip wood baskets.

Wood veneer comes in such a variety of colors and woods. Makes me itch to make lots of little baskets.
I started by cutting some long strips of the veneer as thin as I could. I used my paper trimmer. The strips were approximately 1/8″ wide. I found that it was easiest if I cut the strips on the paper trimmer at 1/4″ and then went back with scissors to trim in half.

Now the fiddly part. Soak in warm water to remove the backing…sigh…not a fun part.

A few strips at a time…worked best for me. Otherwise, the paper backing got too soft and instead of peeling off, I had to scrape it off. Ugh!
You will need 10 strips of the veneer to start with.
Starting at the bottom of the basket. Lay down two strips crossing at the middle. Making sure you have the right side of the veneers facing down. I glued mine in place. Then another two strips , weaving over and under on alternate strips

I left a little space between each of the strips. Keep adding strips until you have five strips each way.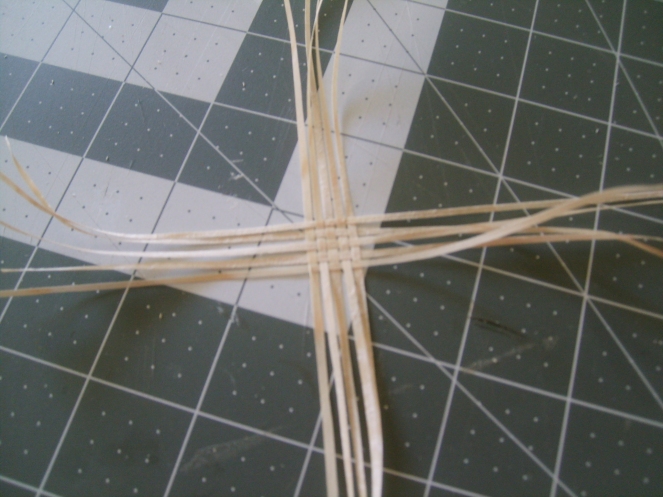
Next step is to bend the strips up at a 90 degree angle. To make the sides of the basket. This is for a square basket. Prepare some more strips for weaving the sides of the basket.

Starting in the middle of one of the sides, weave in a strip and trim with enough over lap to cross over a couple of strips. For the sides of the basket the strips are placed close together. No spacing as we did on the bottom. Continue with weaving strips up the sides until you get your preferred height.


I did five strips high to make a square basket. Trim off excess strips.

Weave in a strip for the basket handle. Sorry so blurry.

I added a contrasting color of veneer to the handle and upper edge of the basket.
Using some quilting thread and a needle I secured the handle and trim.

Here’s a close up the the basket to help see.

Thanks for looking…hope you enjoyed and are itching to make some of your own baskets.
On to more ideas bubbling around in my head….let see. I want to make rubber gloves, balloons , rocking horse with flocking victorian style, baby buggy, rooster …etc…etc…etc.


Thanks for the video enjoyed it. Need baskets its spring!
LikeLike
A big Thank you for the kind comment
LikeLike
I loved doing the basket I can’t wait to do more of your tutorial’s thank-you soooooo so much for taking the time to do this for me and many more people. Keep up with the great work.
LikeLike
Awe! TY! Nice comments are always so energizing for continuing on!
LikeLike